
©2024 Shin's PA workshop. All rights reserved.
![]() From Japan
From Japan
About hand soldering of MEMS microphones (MEMS microphone practical application project)
Introduction
Hi Thank you for always visiting my blog from overseas.
I have been posting about the practical application of MEMS microphones for audio applications on this site. From January 2022 until now, this site has been visited from the following countries. I would like to thank you once again.
Australia, Brazil, British Indian Ocean Territory, Canada, Denmark, England, France, Germany, Greece,
hong kong, Hungary, India, Indonesia, Israel, Italy,
Kazakhstan, Korea, latvia, luxembourg, Malaysia,
Netherlands, New zealand, Philippines, Poland, Russia, Singapore, Spain, Taiwan, Thailand,
United Arab Emirates,
This was found out from the actual access statistics of people who visited this blog site from Google searches in various countries.
Since it is not possible to check the total number of visitors using other visiting methods, I suspect that this blog actually has fans from many more countries.
Especially since the article on "MEMS MIC Practical Application Project," the number has increased.
I have received inquiries about purchasing my works, but I have declined all inquiries.

MEMS Microfones
Infineon IM73A135V01, with lead wires hand-soldered
The number of views has increased significantly since this device, which is smaller than a grain of rice, was found to have performance and quality comparable to great condenser microphones such as DPA and SCHOEPS.

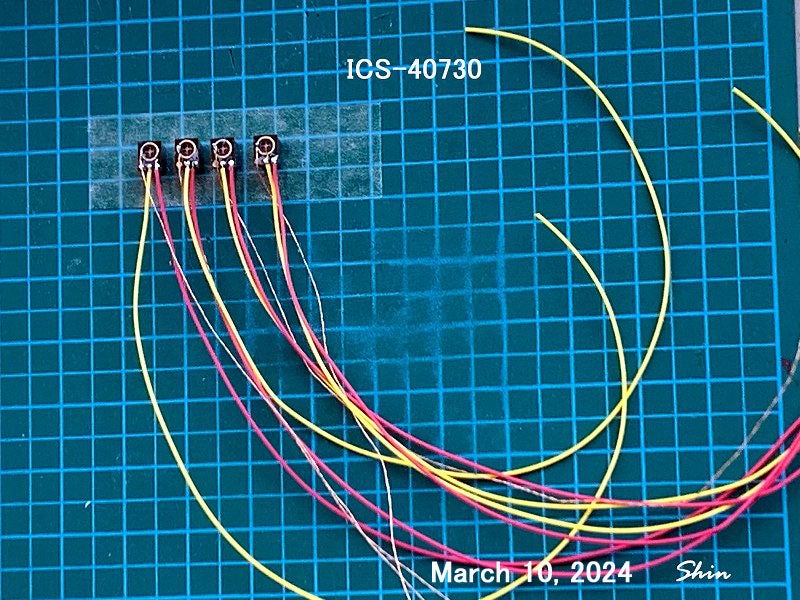
Video.2 microphone arrangement Philips method using 4 Probe Ⅱ Lz (ICS-40730)
Check out the sound of my MEMS microphone on YOUTUBE videos.
Happy news
I received a happy email from my friend Mr.CK, as my friend from Turkey., telling me that it was a success.

In his case, he was able to successfully attach leads to ICS-40730 using conductive paint and adhesive without applying heat.
! There are no strict rules or recipes for DIY microphones using MEMS microphones.
If there are new methods, let's introduce them to each other like this.
It is necessary to clearly indicate the "source," it's a matter of courtesy.
Ideas learned there should not be used for profit.
How to hand solder a MEMS microphone
The soldering method I developed
![]() ”Hand soldering is the basics of making your own”
”Hand soldering is the basics of making your own”

Handmade microphones using MEMS microphones have finally gained citizenship.
I'm sure some people have already made it, but it's not as easy to handle as ECM, and I imagine it was very difficult to solder it.
MEMS MICs are essentially electronic components that require reflow.
There are four major processes involved in assembling circuit boards by reflow: preheating, soaking, reflowing, and cooling.
In other words, it is not a device that should not be heated, but a device that must be heated before use.
However, if you suddenly use a soldering iron, the strain on the constituent materials will cause cracks and circuit breaks, which will destroy the MEMS MIC.
Through trial and error, I was able to establish a method that allows for safe and stable hand soldering by performing "preheating", one of the four steps in the reflow process.
(Reflow profile diagram)

These are the "thermal design" standards for safe use of MEMS MIC ICS-40730.
Other MEMS MICs are also similar.
In other words, even when soldering by hand, "destruction" will occur if the soldering work is not based on this "Soldering profile".
Before doing the actual work using a soldering iron
In order to safely hand-solder MEMS MICs with thermal design for reflow, some ingenuity is required.
Here I will take a step-by-step look at soldering lead wires to Invensense's "ICS-40730". This is exactly the same with other MEMS microphones.
I arranged it like this, the red zone is the important "preheat". (For ICS-40730)

This unique "Prehrating", which is part of the "Soldering profile", became an important "key" that made manual soldering, which was said to be "impossible," possible.
postscript Mar 20. 2024
In response to this blog post, we received the following questions from our readers, so we would like to answer them.
question:
When I applied heat with a heat gun, the microphone broke immediately.
Heated at 100°C for 1 minute. After turning off the heat gun, I immediately applied creamy solder. I also soldered this using a 25W soldering iron with a fine tip. I also measured the temperature with a thermometer.
answer:
Follow the heat treatment instructions in the article.
Cream solder is only used as "preliminary solder". Solder it quickly (0.1s to 0.2s) (see photo). It's OK if the electrodes glow with solder.
Furthermore, as I am writing this article, I am conducting lead soldering on five ICS-40730 units in parallel. All of them are normal and the test was completed without any sensitivity deviation (within 1 dB, if any).
Q1-
When applying heat with a heat gun, do you cover the microphone hole, or do you leave it open so that the heat can enter through the hole?
A1-
Place the hole upwards and blow hot air at an angle.
Q2-
When using the heat gun on the microphone, do you apply heat from the sides or from the top and bottom
A2-
Blow hot air at an angle with the hole facing up.
Q3-
When soldering using a heat gun or soldering iron, do you apply hot air to the microphone?
A3-
Using the photo as a reference, blow hot air at about 100℃ for 1 minute to even out the microphone.
Q4-
Should I apply cream solder to the lead wires?
A4-
i don't use it
Please refer to the above information again.
Let's actually do the soldering work

Example of the soldering iron used by the author (HAKKO FX-600 with temperature control)
If you are concerned about the small size of the parts and use a soldering iron with a small W, the heating time will be longer and there is a possibility of damage due to localized heating.
STEP.1MEMS MIC unboxing

TDK Invensense ICS-40730
STEP.2preheat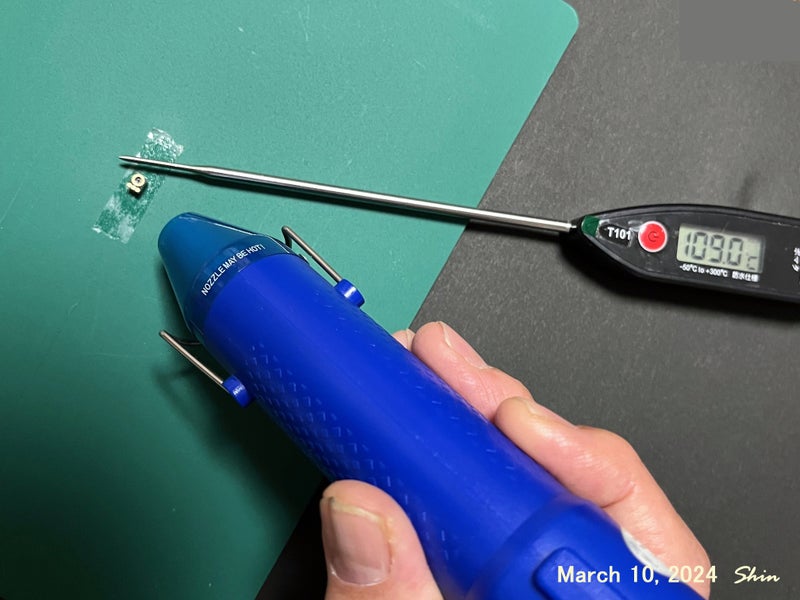

Preheating: Heat to approximately 100℃ to 110℃ for 1 minute with a simple heat gun
(no need for a thermometer once you get used to it)
STEP.3cream solder application

Apply cream solder to the electrodes of the MEMS microphone.
STEP.4Preliminary soldering of electrodes using cream solder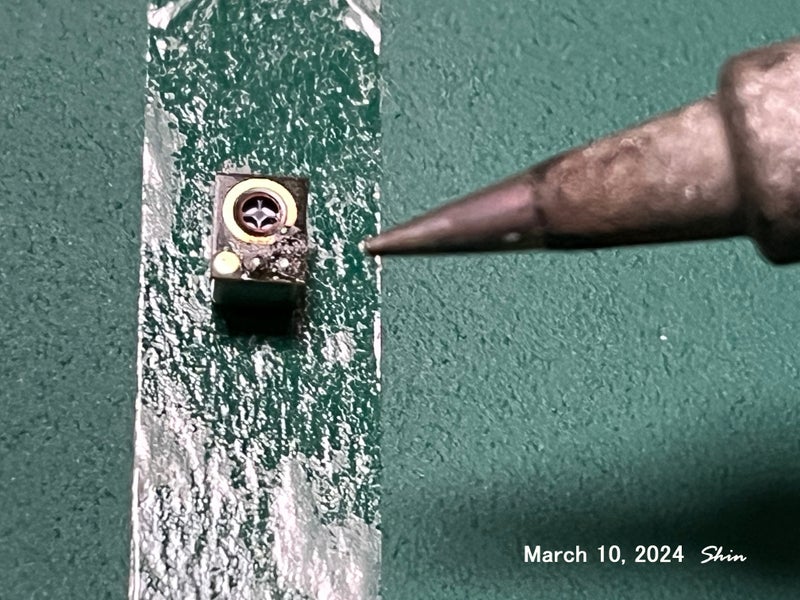

It's OK if the cream solder turns into metal and shines when you apply the tip of the iron for a moment.In my case, the time is about 0.1second
STEP.5Soldering the lead wires
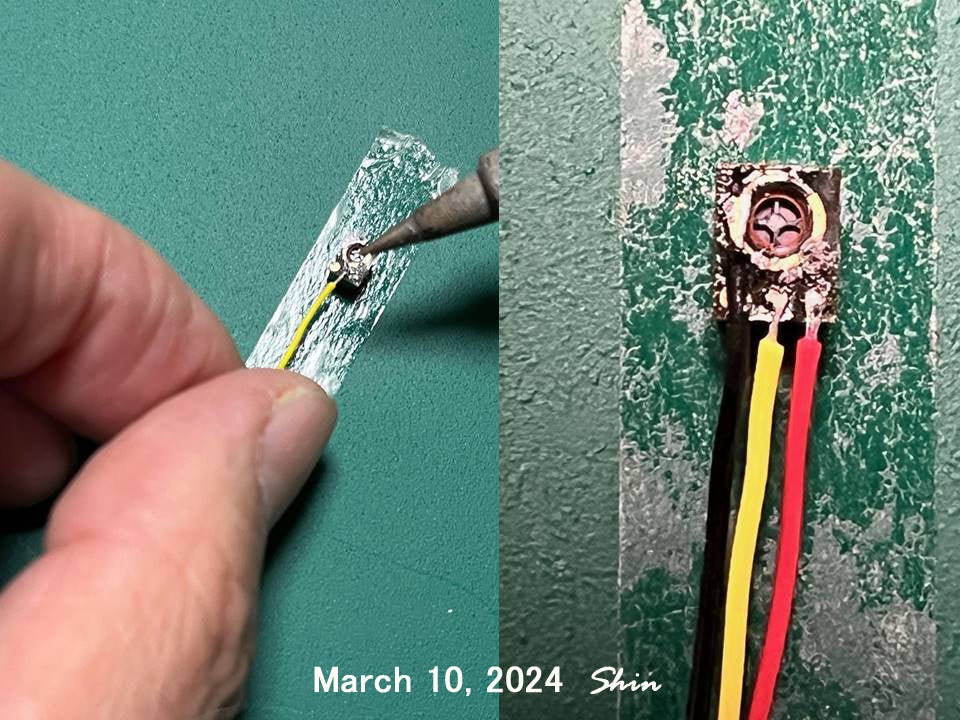
Quickly solder the pre-soldered lead wire (AWG-28 to AWG-32) to the electrode.
At that time, you only need to apply the tip of the iron for a moment, and you don't have to think too much about strengthening the soldering.

Infineon IM73A135V01,
STEP.6Strengthen and insulate the soldered part of the lead wire, complete
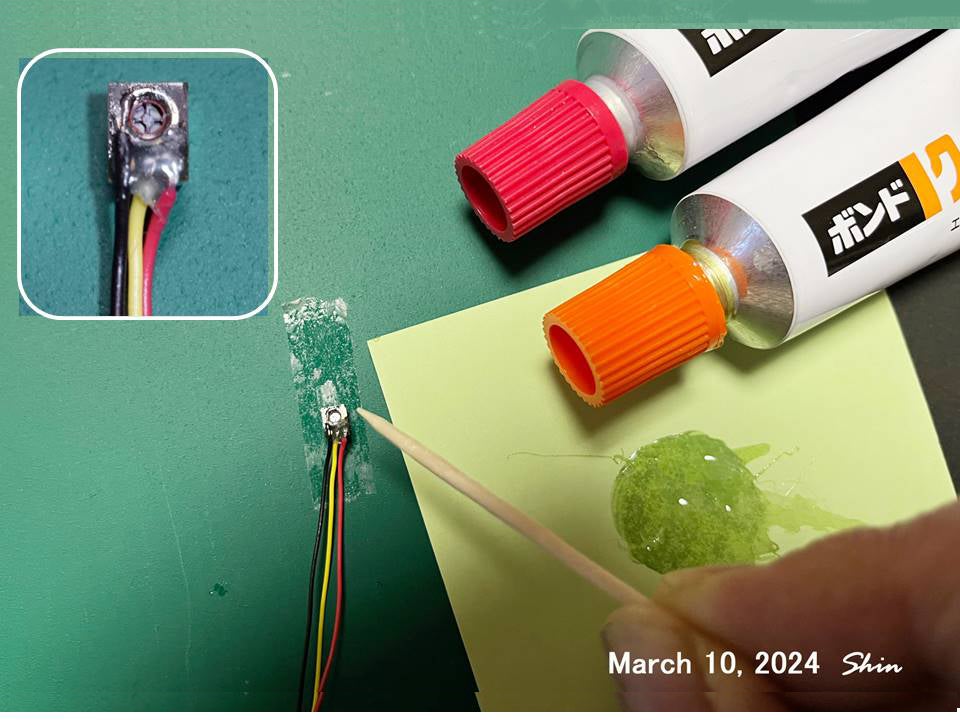
Use a two-part epoxy adhesive to insulate and protect the soldered electrodes.

Any available brand of two-component epoxy adhesive will do.
This completes the manual soldering of MEMS-MIC.
Note: Thin shielded cable can be made using the same steps, but it will be more difficult than making lead wire.
Compatible with AWG-28 to AWG-32. Soldering thick shielded cables is very thermally dangerous.
Let's try some actual soldering work. From Japan, I wish you all success.
Mar 17. 2024 Shin.
@@@@@@@@@@@@@@@@@@@@@@@@@@@@@@@@@@@@@
©2024 Shin's PA workshop. All rights reserved.
[Disclaimer]
★The posted circuits, photos, explanations, etc. are intended to be used by acousticians and amateurs as a reference when producing handmade products or conducting test evaluations.
★Customers are responsible for product performance, functionality, safety, etc., and I (Shin) do not take any responsibility.
★It is strictly prohibited to plagiarize works based on articles on this site for commercial purposes, such as selling them to third parties.
★When reusing or publishing information obtained from an article, please be sure to clearly indicate the source.
I'm sure Shin will continue to stimulate the audio world with his unique commitment and madness.
Workshop manager Shin
email
sound_ai♪xk9.so-net.ne.jp (Please change ♪ to @)