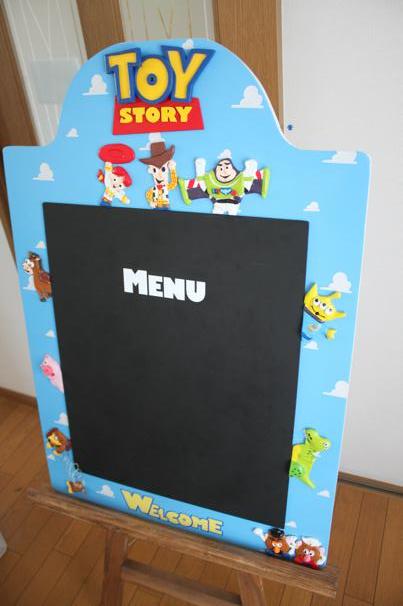
2019 ハロウィン衣装Halloween clothes TOY STORY4 Axel

製作ばっかで更新していません。
今更ですが、今年のハロウィン衣装を紹介します。
今年は、TOY STORY4が上映されたので、それ関係で....
ていうか、もうネタがなかったので丁度よかったです😅
どうしようかな....
色々考えて、マニアックなのがいいと思っていたんですが、
DVDがまだ出てなかったので、資料がない!
一番資料のある人物.....
あまりマニアックじゃないけど.....
この人で行こう!

射的ゲームの兄ちゃんです。名前は、アクセル!
え??
「メジャーじゃん!」
ごめんなさい。メジャーです....
作るものはなんだ?
前掛け、靴下?くらいかな?
まずは靴下!

この色だね!

布の絵の具を使って、缶詰に履かせてゴムを伸ばし、マスキング

完成!
ヘッドフォンしてるね....
結構でかいね。イヤーマフでいいか... でもイヤーマフは黄色。
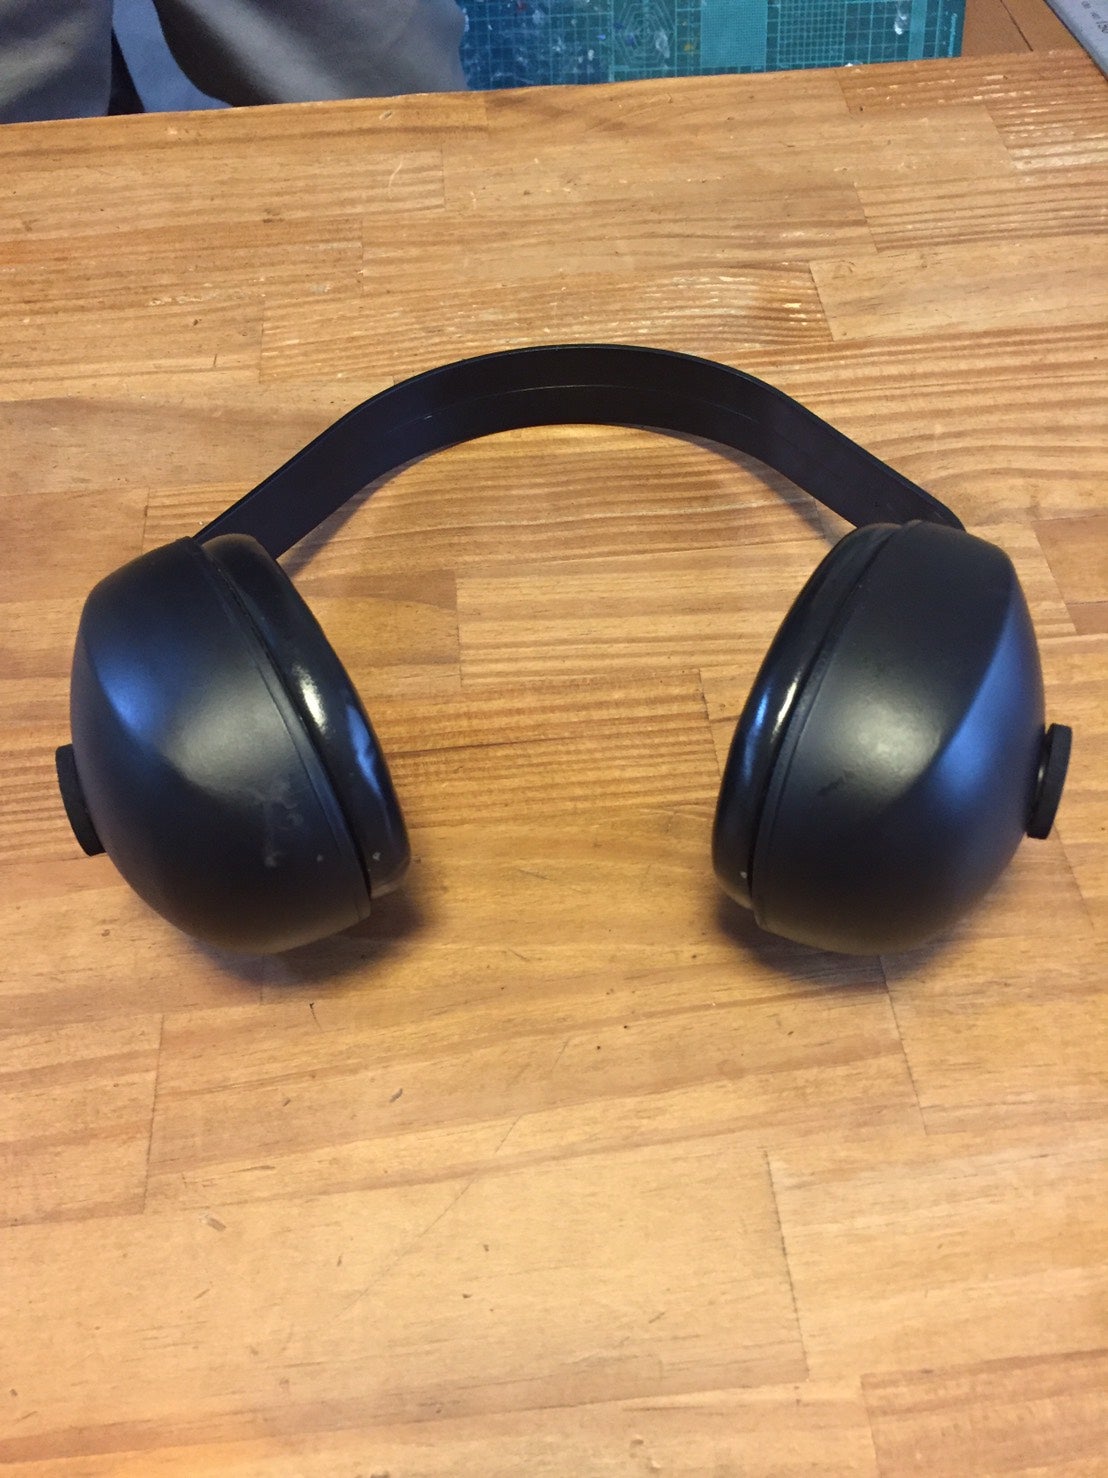
黒く塗っちゃいましょう!
あとは服だね。

前掛けは、似た色の布買って、奥様にお願いしました!
ありがとうございます。
シャツは、水色のポロシャツ買って、
オレンジの布でライン作ってバイアス縁取り!
茶色の長袖シャツとグレーの帽子を買えば完成だね。

さあ、揃いました!
インパです!

カツラ被って、バズを持って...こんな感じ!
みなさん、私がメジャーな服なのでキョトン顔でした......
そう!
知ってますか?
PIXARの作品には、必ずと言っていいほど、
ピザプラネットのトラックが出てきます。
今回、TOY STORY4で出てくるシーンは...
ここです! ふくらはぎのタトゥー!
忘れてはいけませんね。
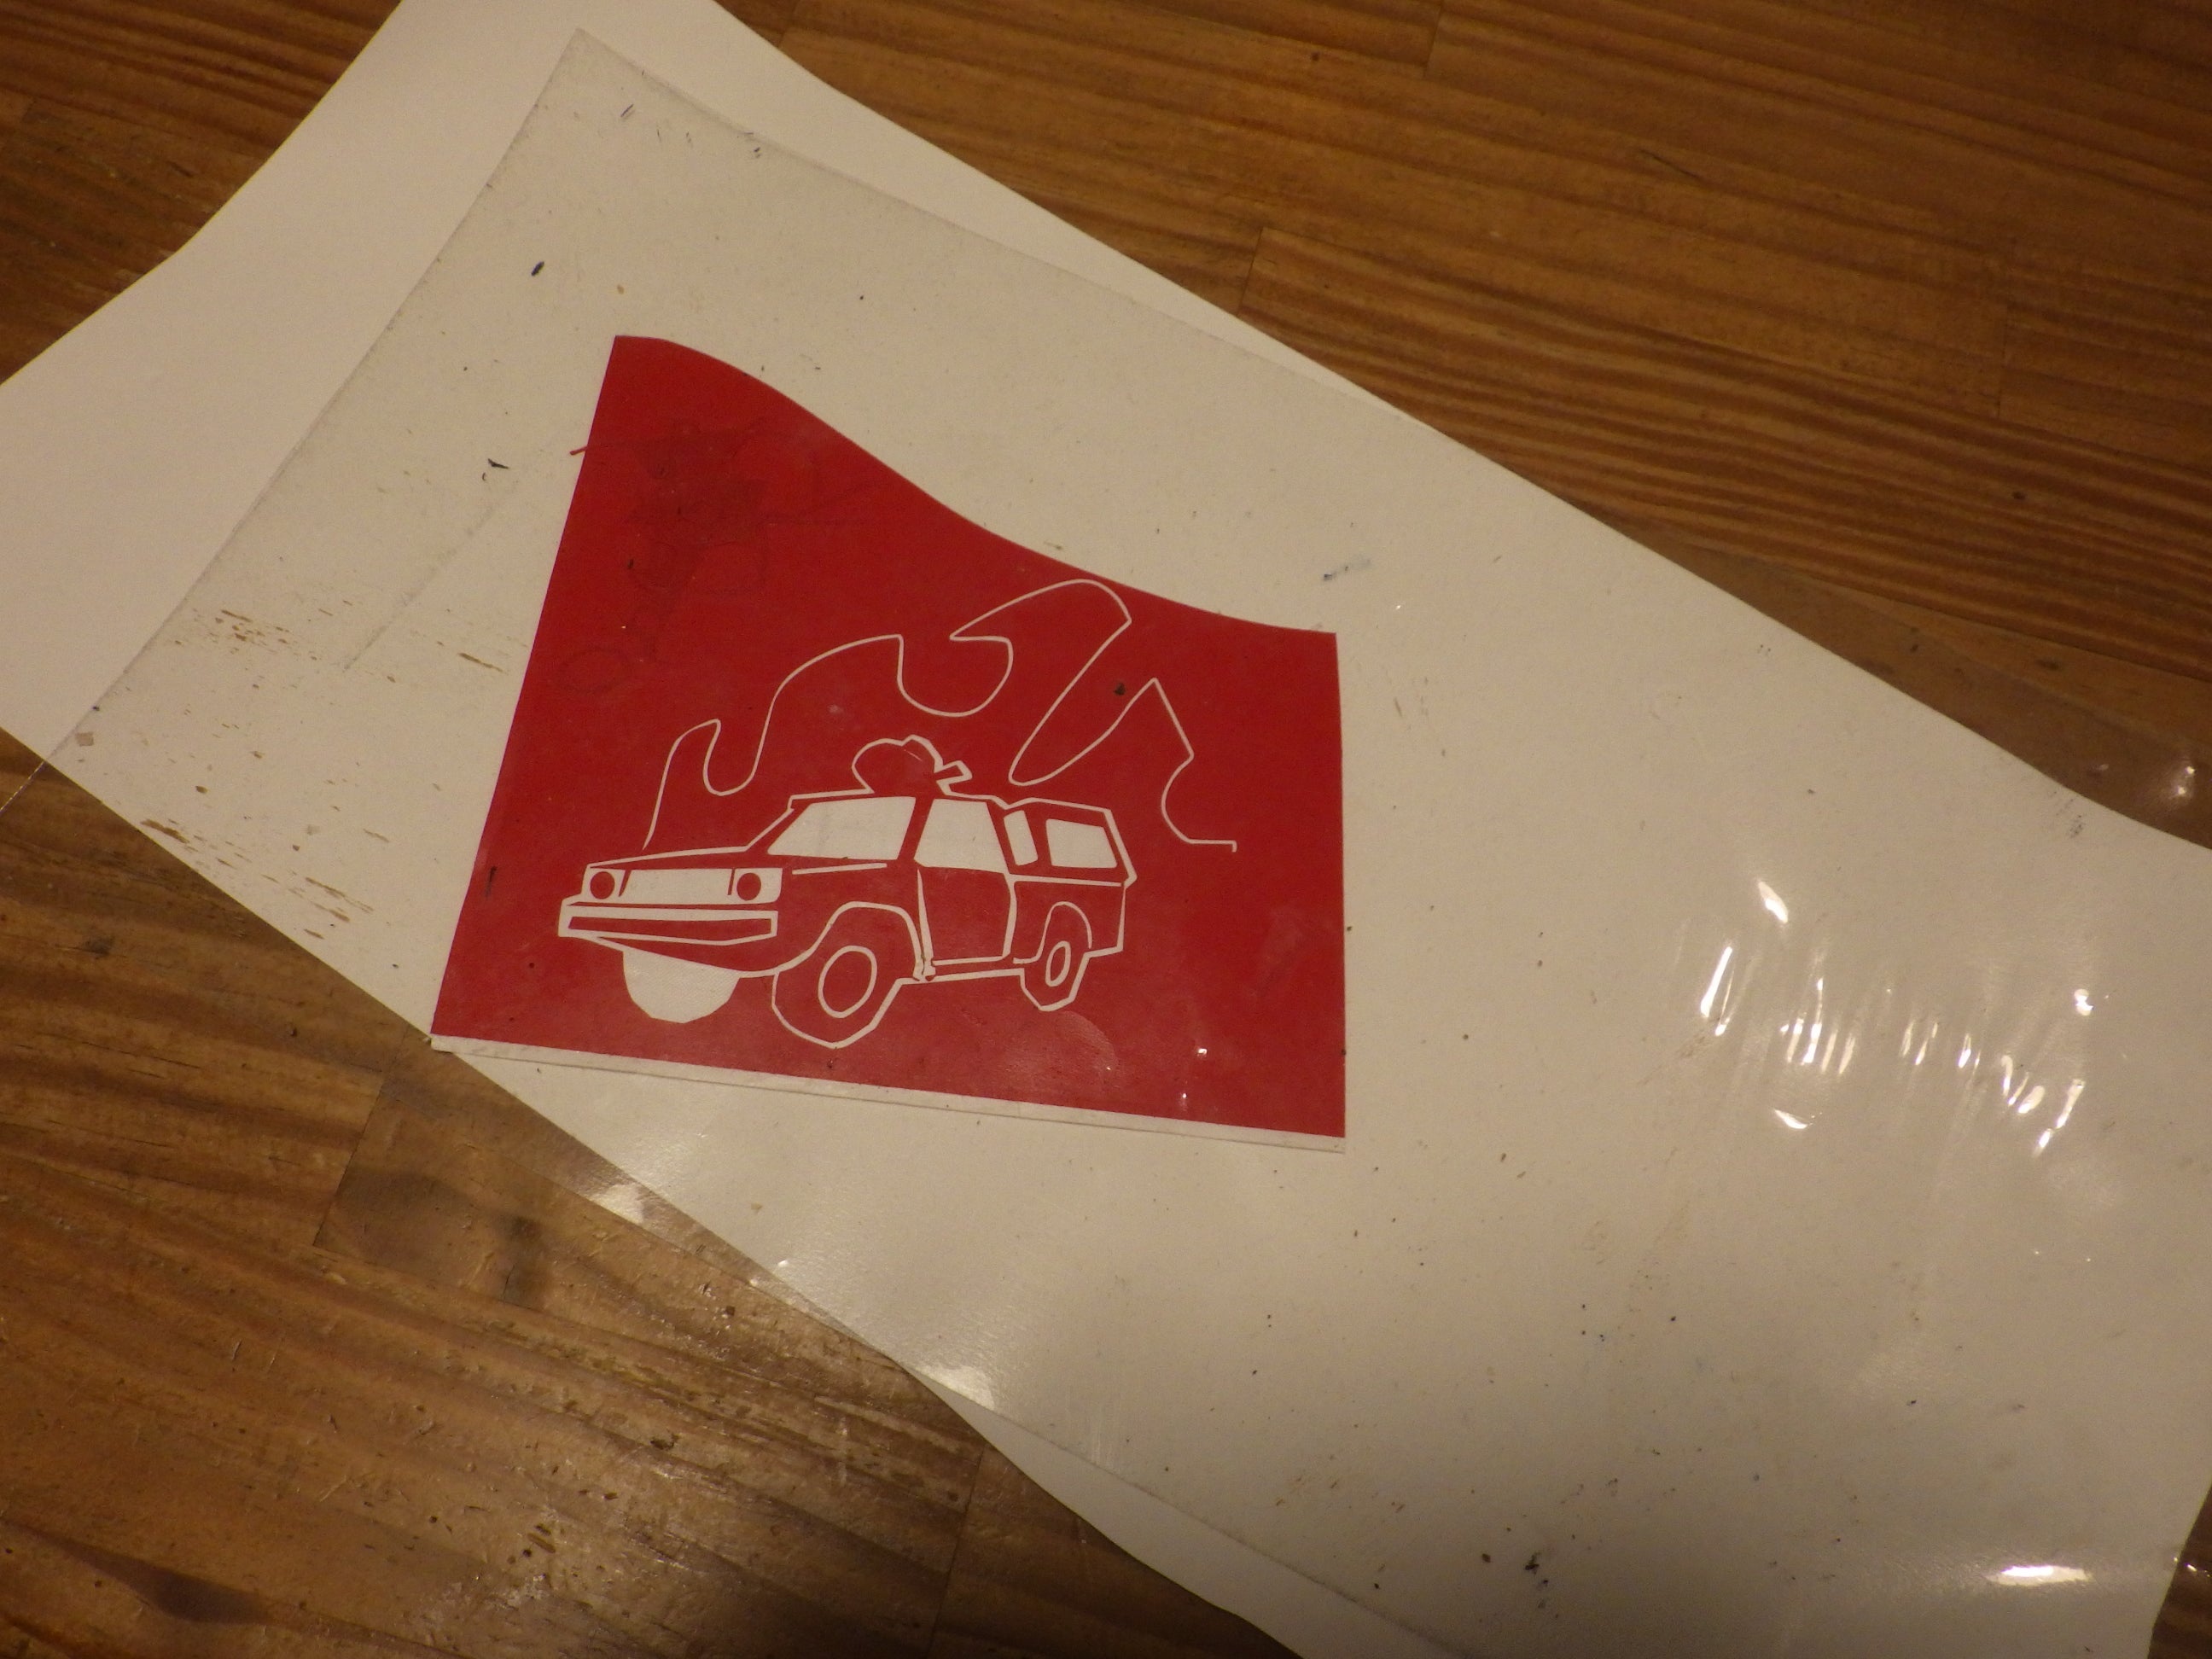
まずはシールを作って....

インパの前の晩、すね毛を剃って、マジックで上から塗り!

色を塗って完成! 届かないので娘に塗ってもらいました!

綺麗に書けてますね!
じゃあ...比較してみましょう!

いっしょだね!
来年は、マイナーで攻めようと思いました!
また懲りずに見にきてください!
TOY STORYアミーマンポップコーンバケツ

ブログネタがいっぱい溜まってるのでアップします!
As a lot of blog material collects, I upload blog!
ここ最近ディズニーランドでは....
It is Disneyland recently...
こんなポップコーンバケツが出てきました。
Such a popcorn bucket is sold and appears.
昔は、バケツにプリントしてあるだけだったのにねえ...
It was only printed in a bucket in old days.
フィギア付きありなんだね。そう思っていると....
With the doll there is it. When I think so...

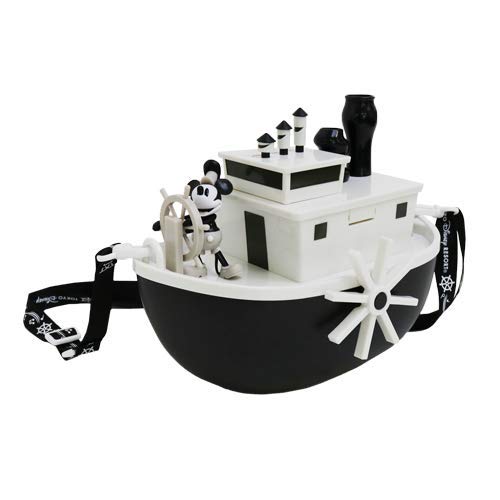
みんな知ってるこのおもちゃ箱ポップコーンバケツ。
Everybody knows this, too. This toy box popcorn bucket.
おお!なんでもありだな。じゃあ他にも出るだろ。出せるだろ...
Oh! Anything is OK. Then, besides, it is sale. It can produce it.
で、私はふと思いました...
I thought incidentally...
「アーミーメンバケツって、バケツのくせにポップコーンバケツになってない」
A bucket of army men is a bucket. However, it is not sold as a popcorn bucket.
ありきたりだから?もうバケツだから?
Because it is ordinary? Because it is already a bucket?
いや!バケツだって頑張ればありきたりじゃなくなるだろ!
No! Even if a bucket does its best, it will not be normal.
やってみよう!
Let's try it!
バケツだから簡単か?そんなことはないねえ....
Is it easy because it is a bucket? No such thing...
❶洗えないといけない
❷蓋の開閉が楽に出来ないといけない
❸壊れやすいのはダメ
❹ただシール貼っただけじゃダメ
❺ストーリーが欲しい
❶ It must be washable.
❷Easy to open and close the lid... I have to do it.
❸ Don't be fragile.
❹ Don't just stick the sticker.
❺I want a story.
これらを網羅して安く作りましょう!
Let's make them all cheap!
まずはバケツ!いろいろ探したけどいいのがない。
First, a bucket! I've searched a lot but there's nothing good about it.

ホームセンターにペンキの小分け用?色作り用?のバケツがあったので購入。(蓋なし)
I found it in a home center. For subdivision of paint? For color making? Purchase. (Without lid)
そのバケツに合わせてプラ板を丸くカット!
Cut the plastic plate round to fit the bucket!...

手が入るくらいの位置で開閉するようにカット。そしてプラスチックの蝶番つけて
リベットで固定。
蓋が簡単に開かないくらいのスペースを外側に残してウレタンカバーを
カットして貼り付け。
(コーナーなどに当たっても大丈夫なように付けるカバーの端材ね)
I cut it to open and close it at a position as a hand enters. And I attach a plastic hinge and am fixed with a rivet.
I have space as a cover does not easily open outward. I cut an urethane cover and stuck it.

紺色のシールシートを買ってきて、カットしてこんな感じ!
逆さにしても蓋は落ちません。
I buy a dark blue seal sheet and cut it. Such a feeling!
The cover does not fall even if I invert it.

赤と紺と星のシールを作って横に貼るとこんな感じ。
I made red and dark blue and the seal of the star. I put it aside. Such a feeling.

真横2箇所に肩からかけるヒモが付けれるようにプラ板をつけました。
I touched a plastic board so that a string from the shoulder to two places of just beside was attached.
これでヒモつければ完成なんだけどね....
It is completion if I attach a string in this......
これでは、ダメ!ここまで作った意味がない!
In this, it is not good! What I made to here is wasted!
アーミーメンといえば....
Army men are ...

これね! トランシーバー!
It is this! A transceiver!
バケツにサイズを合わせてスチレンボード重ねてベースを作り周りは
石粉粘土で固めましょ!
I put a styrene board to bucket size and make a base. Let's harden it with stone powder clay from the top!

出来たよ!これにシールを貼ります。
The completion! I put a seal on this.
次はヒモです!
It is a string next time!
パークのポップコーンバケツの紐は、こんな感じのみんな平たいリボン紐。
The string of the popcorn bucket of the park is such a feeling. A flat ribbon string.

アーミーメンといえば、縄跳び!! なので
Army men = jump rope! So
白い平たいリボンを買ってきて、赤く塗ろうとしたところ....
I bought white flat ribbon and was going to paint it red......
滲む! 太さもまちまちで格好悪い。アイロンプリントでやるには手間も掛かるし、
ズレる可能性も高い!
Is blurred! Boldness is different.
ん〜〜〜。そのままいこう!
it is ... Let's just go!

ホームセンターで紐買ってきて、後は手芸屋さんパーツ。
I bought a string in a home center. The remainder parts do shopping in handicrafts shop.
これをバケツに留めれば、機能的には問題ないね!
It does not have any problem functionally if I pin this on a bucket.
では、これ以上撮った写真がないので.......😢
Then as there is not other than this photograph......😢
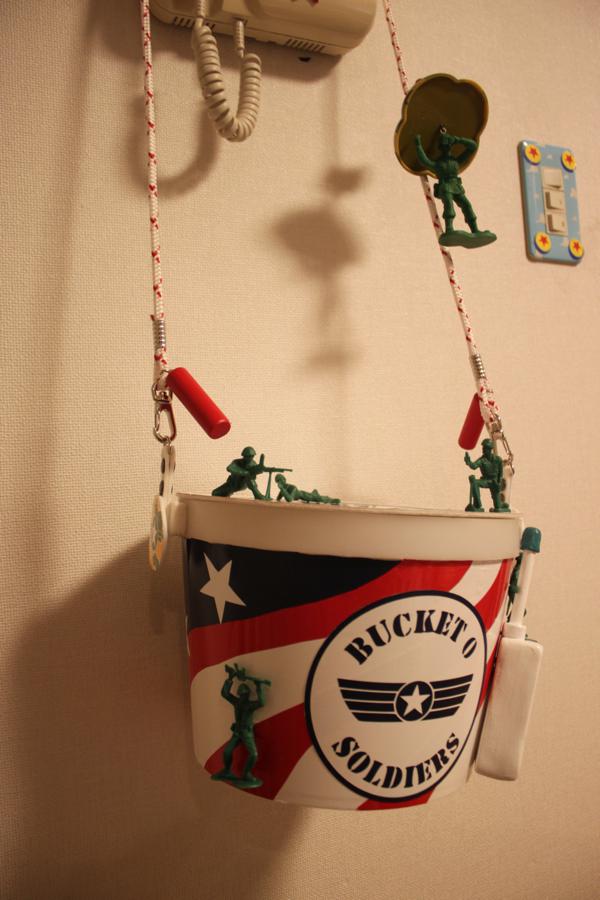
完成! Completion!
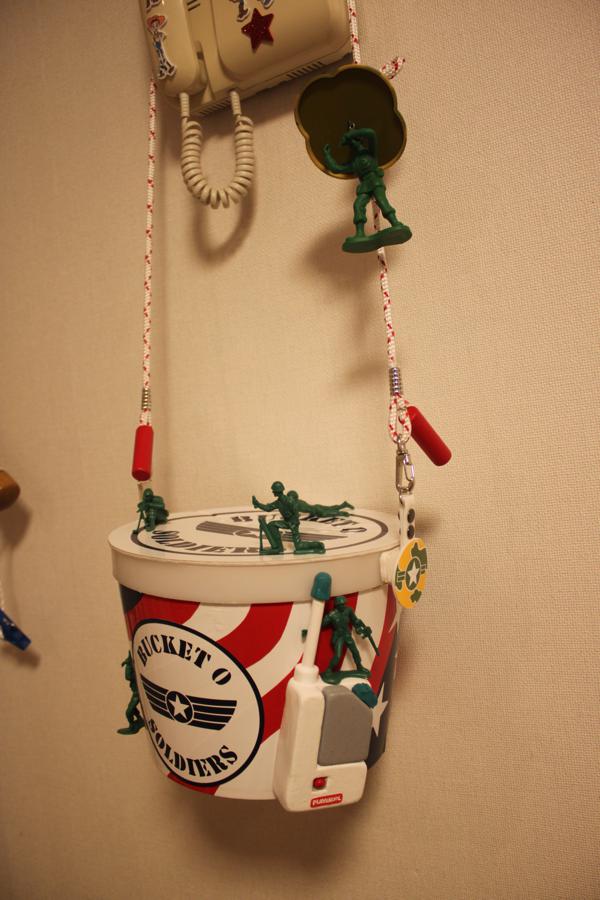
実際のおもちゃのアーミーメンをボンドでつけました。
I followed the army men of the real toy in bond.

紐の根元には、縄跳びの握りを付けました。いいでしょ!
I attached a grip of the jump rope to the root of the string. Good!

ロープの留め具の根元は、ビスが丸見えだったのでアーミーメンの
マークシールを丸く切ったプラ板に貼りました。
The root of the clasp of the rope had a perfect view of a screw.
So I put the mark seal of army men on the plastic board which I cut in a circle.
トランシーバは、蓋につけると開閉の邪魔になるので横に接着!
As I interfere with the opening and shutting when the transceiver attaches it to a cover, I adhere aside!

パークのリボンのように調整ができないので黒い調整器具を付け、
パークで売ってたパラシュートのアーミーメンのおもちゃをつけました!
I cannot adjust it like the ribbon of the park.
So I attached a black adjustment appliance and attached the toy of the army men of the parachute sold in a park!

全体像はこんな感じね!
The big picture is such a feeling!
さあ、実際にパークに行きましょう!
Well, let's actually go to the park!

こんな感じ。冬でした。寒かったです!
Such a feeling. It was winter. It was cold!
もちろん....
Of course ...

ガシガシ食えます!!
I can eat it hard!
でもこれ....
But it is this ...
「パーク内で売ってるバケツじゃないから、ポップコーン入れてくれないよ」
”It is not a bucket sold in a park. Therefore she does not put popcorn”
じゃあ、紙カップで買ってこれに入れればいいかって思って、
ポップコーン売り場に並んでいると...
Then you should put it to be able to buy it with a paper cup. I thought so and lined up in the popcorn section.
キャストのお姉さんと、
With the cast of the woman
『そちらのバケツに入れますよ!』
"I put it in that bucket!"
ああ(いいの?)...「じゃあ、お願いします」
(Is it good? )"Give me it"
『これ可愛いですね。TOY STORYですよね。どこで購入されたんですか?』
"This is pretty. It is TOY STORY. Where did you purchase it?"
「作りました。」
"I made it."
『え〜〜。これ売ってたらわたしすぐ買いますよ!』
"I hand it if this is sold and buy it immediately!"
「😅 じゃあ商品化提案してくださいね」
”😅Then you commercialize it, and please suggest it”
『🤣』
って感じでした。
It was such a feeling.
キャストさんの食いつきが良くて、バケツに視線をすごく感じ、
キャストさんを見ると目が合い....
「これどこで購入?作った?」の質問がくるというパターンが多かったです。
The cast stares at a bucket.
Eyes match the cast. ...
"Where is this the purchase? Did you make it?" Such a question. There were many such patterns.
アーミーメンは、どうかな? 商品化はないかな??
How about army men? Is there not the commodification? ?
まあインパクトがあるものが出来て良かったです。
It was good that the thing with the impact was made.
しかし、改善点あり!
However, there is a refinement!
アーミーメンの人形は、突起してる上に接地面が少ない!
The doll of army men projects, and there are few treads!
人形が、自分やいろんな場所に当たります。
A doll hits myself and various parts.
1個外れて近くにいた女の子が拾ってくれました。
The girl whom one was removed, and there was near picked it up.
ボンドじゃなくて、透明のコーキングで貼った方がいいね!
(そうすれば隙間が埋まって接地面が増えます)
It is not bond and should put it by coking of the transparence!
次は何やろうか....マックインのポップコーンバケツを
ドッグ仕様にもしたいんだよね....
What shall I do next time?
まだたくさん溜まってます!
I still save a lot!
懲りずに見にきてください!
Please come to see it without learning lesson!
TOY STORY4電飾ロゴ

最近作ってばっかで、ブログにアップしていません。
I make it recently and. I do not upload blog.
ということで....
So...
まもなく TOY STORY 4 日本上映ですね!
It is the TOY STORY 4 Japan screening soon!
もうアメリカでは、上映していて皆さんいろいろと感じている様です。
In the United States, it has already shown.
で、、TOY STORY4が上映決定して、ポスターが決まってから
作ろうと思っていた物!
It showed, and TOY STORY4 was decided, and a poster was decided.
Then the thing which I was going to make!

それは、これです! 電飾ロゴです!
It is this! It is an illumination logo!
ロゴを木で作って、イルミネーション入れれば出来るんだろ.....
I make a logo with woodenness and will be completed if I let illuminations.
簡単な気持ちで挑みました!
I challenged it with a simple feeling!
だいたい構想練って.....LEDライトを買おう! ポチしよう!
Generally think about a design. ... will buy an LED light!
条件として、
As a condition,
色的に電球色だから、シャンパンゴールドがいいね!
ポスターの電球の数を数えると全部で45個だからそれくらいの数!
Because the color is colored electric bulb, a champagne gold is good!
I counted the number of electric bulbs of the poster. It is 45 in total. Therefore it is a number like it!
そう思ったのですが、今はクリスマスシーズンではない!なのでいろいろ種類がない!!
I thought so, but am not a Christmas season now.
So there is not a kind in various ways!
シャンパンゴールド売り切れ!
A champagne gold sellout!
50個のLEDは?
50 LED?
あった! でも色は白しかない...まあいっか...後で色塗ろう!
There was it! But ... that the color has only white Oh, it is good, ... Let's paint with a color later!
「STORY」の部分は、全体的に光ってる様に見える。
The part of "STORY" seems to glitter generally.
なので、そこの部分はプラ板(看板や照明のカバーで使うやつ)で行こう!
So the part over there will use the plastic board! (thing to use with a signboard and a cover of the lighting)
だけど、イルミナーションのLEDは、長くて入らないし、プラ板との隙間がないから
光が点々になることは、間違いない。なんかいい方法ないかな??
But the LED of illuminations is long and does not enter.
It is certain that light becomes points because there is not the gap with the plastic board.
Is there not any good method? ?
なんかいいもんあるぞ! LEDテープ! 世の中便利になった。
There is some good thing! LED tape! It became convenient in the world.
このテープ幅、10mm弱なので、枠を9mmのベニアで作れば内側側面に貼れる!
This tape width, a little less than 10mm. So I can put it on the inside side if I make a frame with veneer of 9mm!
これで構想は決まった!
The design was decided in this!
次は大きさだ!
It is size next time!
ポスターで見ると...電球の大きさ✖️4〜5くらいが文字の太さ。
I see it with a poster. Size around *4-5 of the electric bulb is the thickness of the letter.
LEDに丸いキャップが付けられる。それを付ければ、よりポスターに近くなる。
A round cap is attached to the LED. A poster becomes nearer if I attach it.

キャップの大きさは、20mm。このキャップね。
(昨年クリスマスで使用したもの)
The size of the cap is 20mm. It is this chief. (the thing which I used last year on Christmas)
ゲゲ〜〜。 それだと文字幅100mmかなりロゴがでかくなるぞ!
Are you serious? .Then, a character width 100mm considerable logo becomes huge!
諦めて、キャップ無し。そうすると、5mmの電球。全体の大きさは、A3弱。
I give it up, and there is no cap. Then it is an electric bulb of 5mm. Generally the overall size is A3.
これで決まり!
I am selected in this!
製作開始! だけど、やはり実物に近いもの作りたいよね!
Production start! But after all I want to make a thing near the real thing!

今までロゴは、いろいろ作ったけど、文字が平らな方が綺麗に見えます。
(これ平ら)
I made the LOGO in various ways so far. But I see it neatly if a letter is flat.(as for this, flat)
本当は、Yの上にO。Oの上にTなんだけど、その通り作ると
文字が斜めになります。(これは、斜め)
The truth is O on Y. It is T on O. But a letter inclines when it is exactly like that and makes it. (this is diagonal)
なので、高さ調整! 木で彫った時と同じだね!
So I regulate height! It is the same when I carved it with a tree!
下から...STORYの赤い板〜Yの黄色部分.〜Yの青部分とOの黄色部分〜Oの青部分とTの黄色部分
〜Tの青部分と4の黄色部分〜4の青部分。 この順番。
It is a red board of "STORY" from the bottom. A yellow part of Y. A blue part of Y, a yellow part of O.
A blue part of O, a yellow part of T.A blue part of T, 4 yellow part. A blue part of ... 4. This turn.
なので、Yが一番低い。LED電球の長さは、25mm。
それを基準にして高さを決めましょう!
So Y is the lowest. The length of the LED bulb is 25mm. Let's decide height on the basis of it!
訳わからなくなるので、一文字づつ指定された高さに板を重ね、
ズレないようにいっぺんにカット!
In being puzzled by one character. I put a board on appointed height and cut it at once!

できたできた! TOYは接着して隙間は埋めます。
It was completed! TOY adheres and fills the gap.

そして、縁はこんな感じになります。これは、大変なので塗装の後に接着です。
And the relationship looks such. As this is serious, it is the adhesion after the painting.
その時作った動画! movie!

ここから、穴あけ作業です。数は、ポスター通り!
From here, it is perforator work. A number is according to poster!
穴が空いたら、電球を入れていきましょう!
I will put an electric bulb if I can dig a hole!
コード太すぎ!4本のコードが束ねて出来てるので、解いていきましょう!
A cord is too big! As four cords bundle it up and have it, I will untie it!
このLEDイルミネーションは、延長出来るタイプなので、そのコードがある。
The type that this LED illuminations can extend it. So there is the cord.

そのソケットも邪魔だしそれに付いてるコードも邪魔。
問題なさそうだから2本カット!
The socket is obstructive, too. The cord which it has is obstructive. Because I do not seem to have any problem,
I cut two!
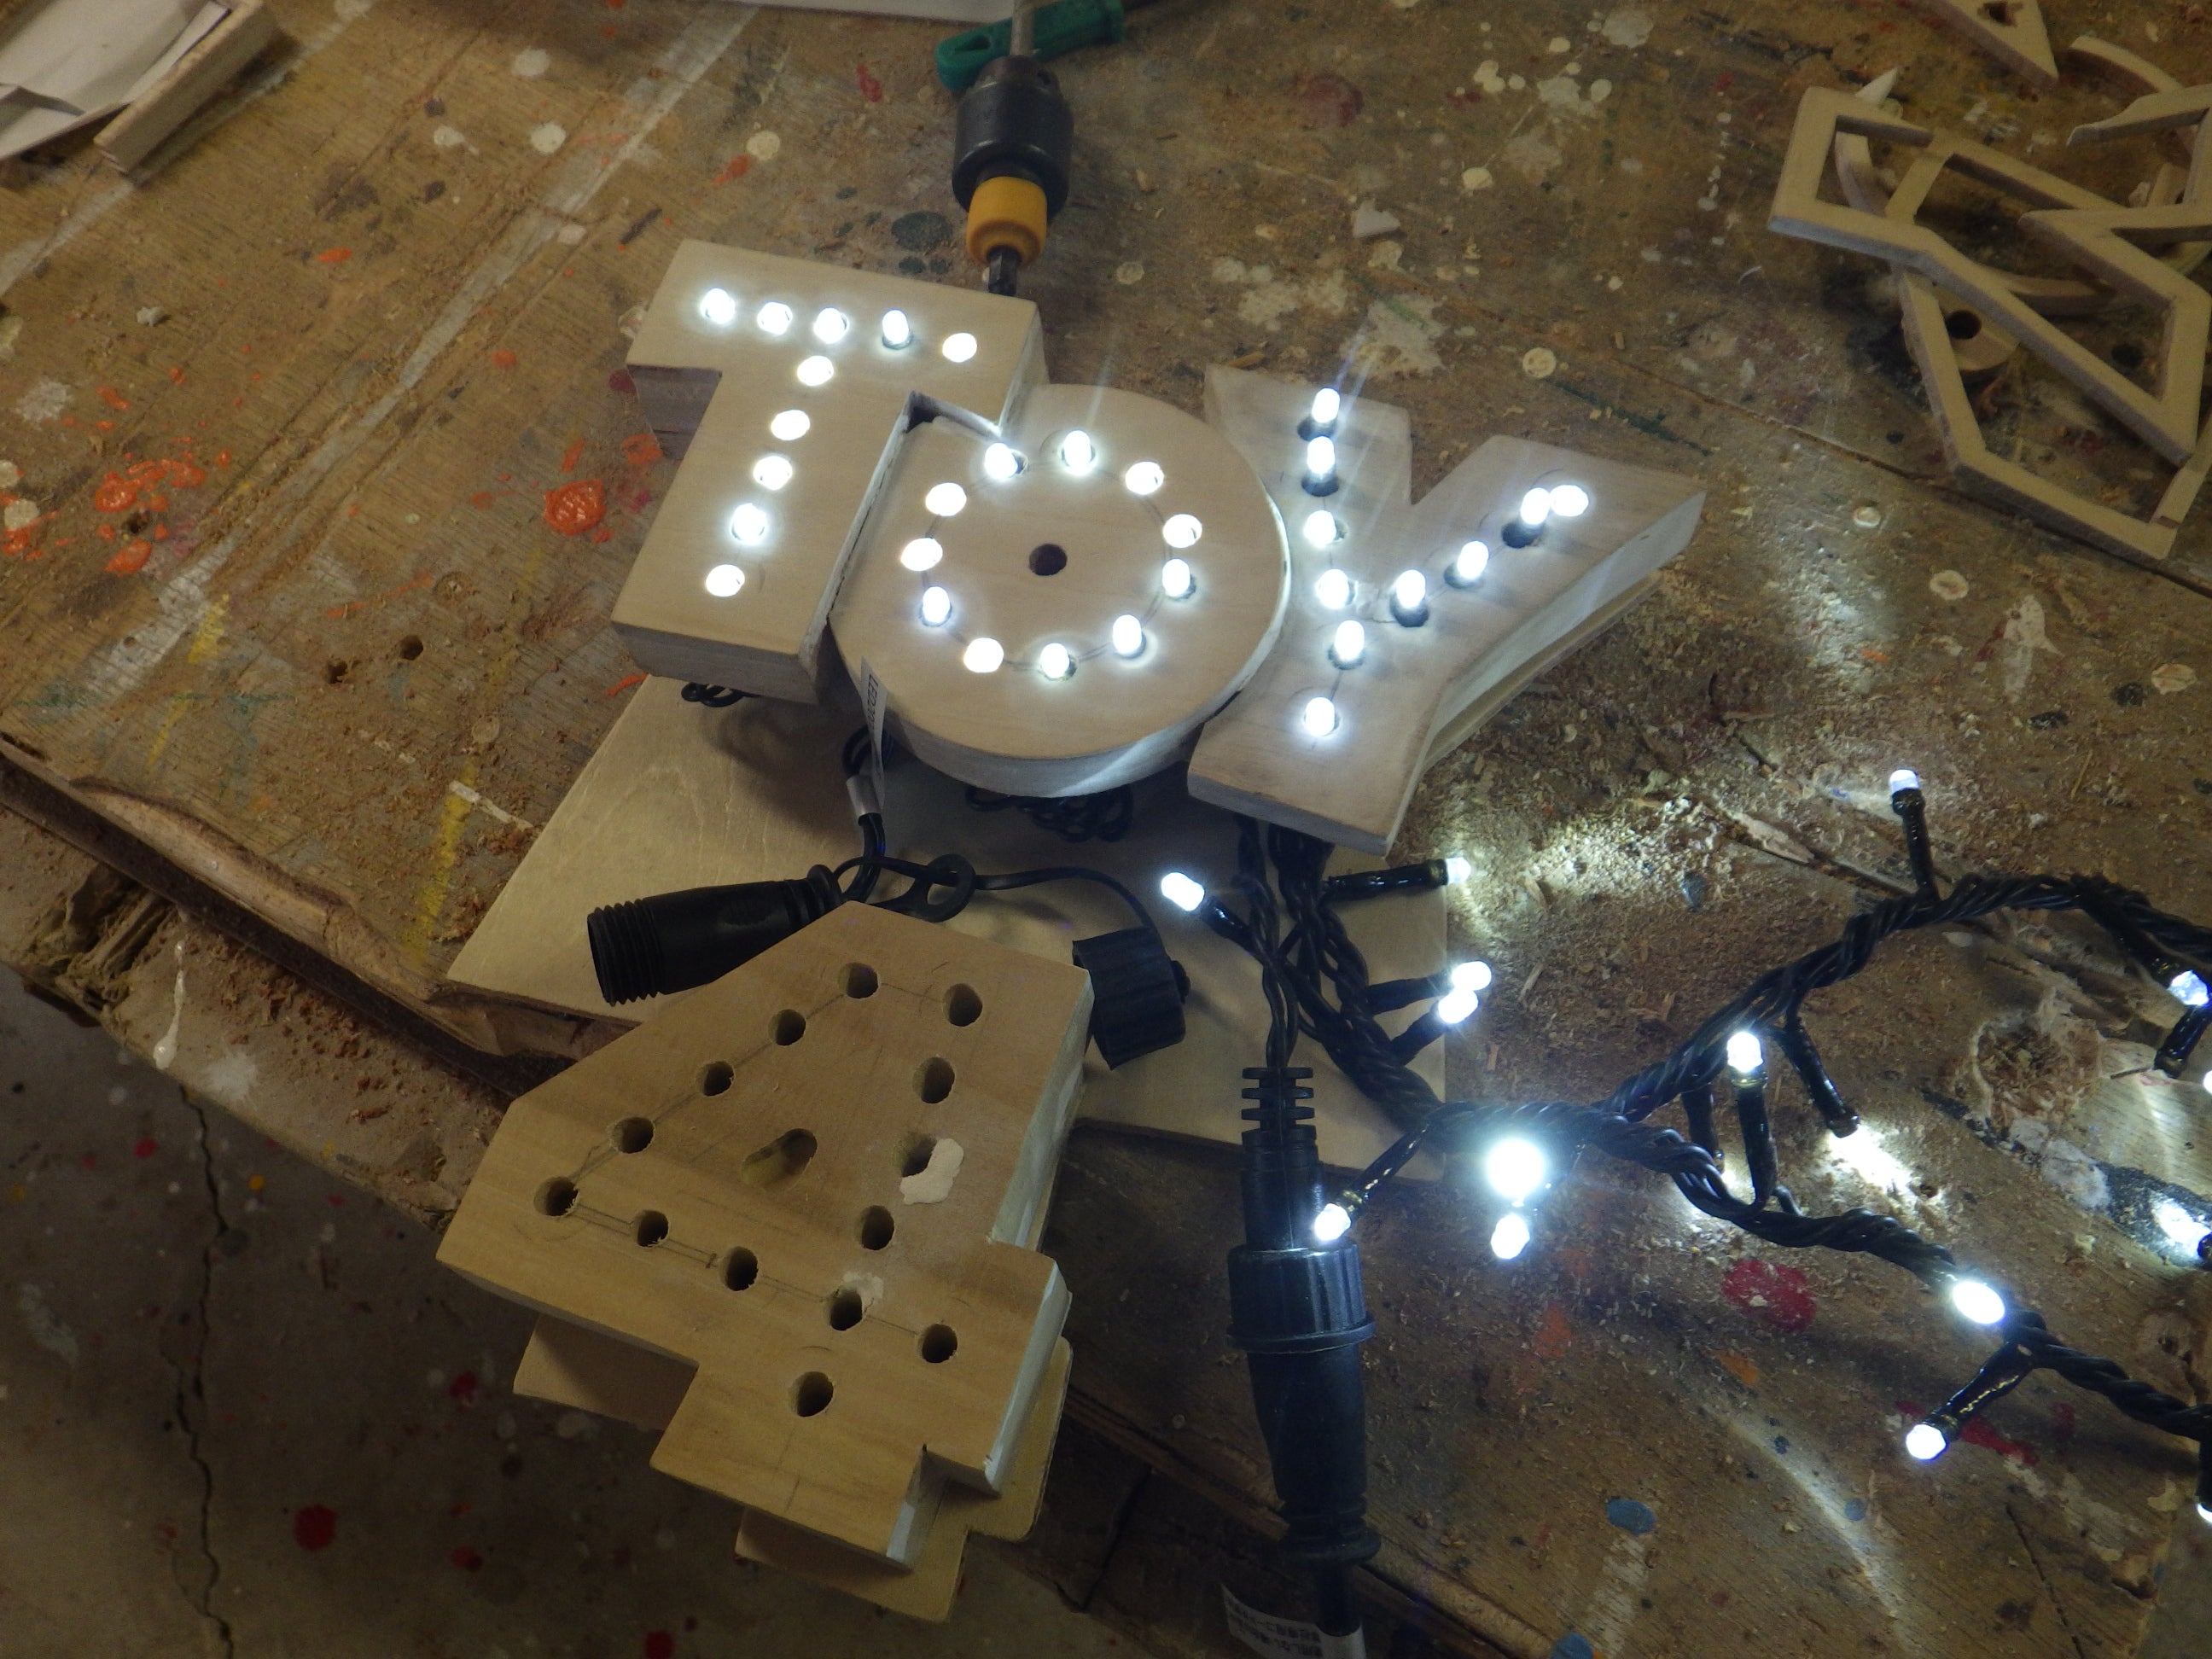
だいぶスッキリした。そして入れて見た。点灯!
I felt fine considerably. And I put it and saw it. Lighting!
あれ?? (これっていろいろ点滅するタイプ。1個おきでキラキラもする。)
Is it that? ? (the type that this flashes on and off in various ways. It flashes on and off with one ember.)
コードをばらして適当に突っ込むと、光のパターンがぐちゃぐちゃだ!
When I expose a code and question properly, a pattern of the light is messy!

こうしちゃったのね....考えてみれば、当たり前だよね。
... that it is caused by this. I am ordinary if I think.
1本づつ交互に入れていきましょう。
I will pour by one in turn.
問題勃発! Oの電球の数は、11個です!参った!妥協しましょう!
(意味のわからない?後ほど分かります)
A problem outbreak! The number of electric bulbs of O is 11! I gave up! Let's compromise!
(the meaning you do not understand it You know later.)
TOYと4は、離れているので、TOYの終わりでコードを切り、
コードを延長させて4スタート!
It is 4 away from TOY. So I cut a cord at the end of TOY.
I let you extend it and start a cord 4!
余りの5個は、テープでグルグル巻きにして光を隠しました。
Surplus five trussed it up with tape and hid light.

位置がずれないようにして、一度電球全部外して、塗装です!
It prevented a position from dragging. I all take it off, and an electric bulb is the painting once!


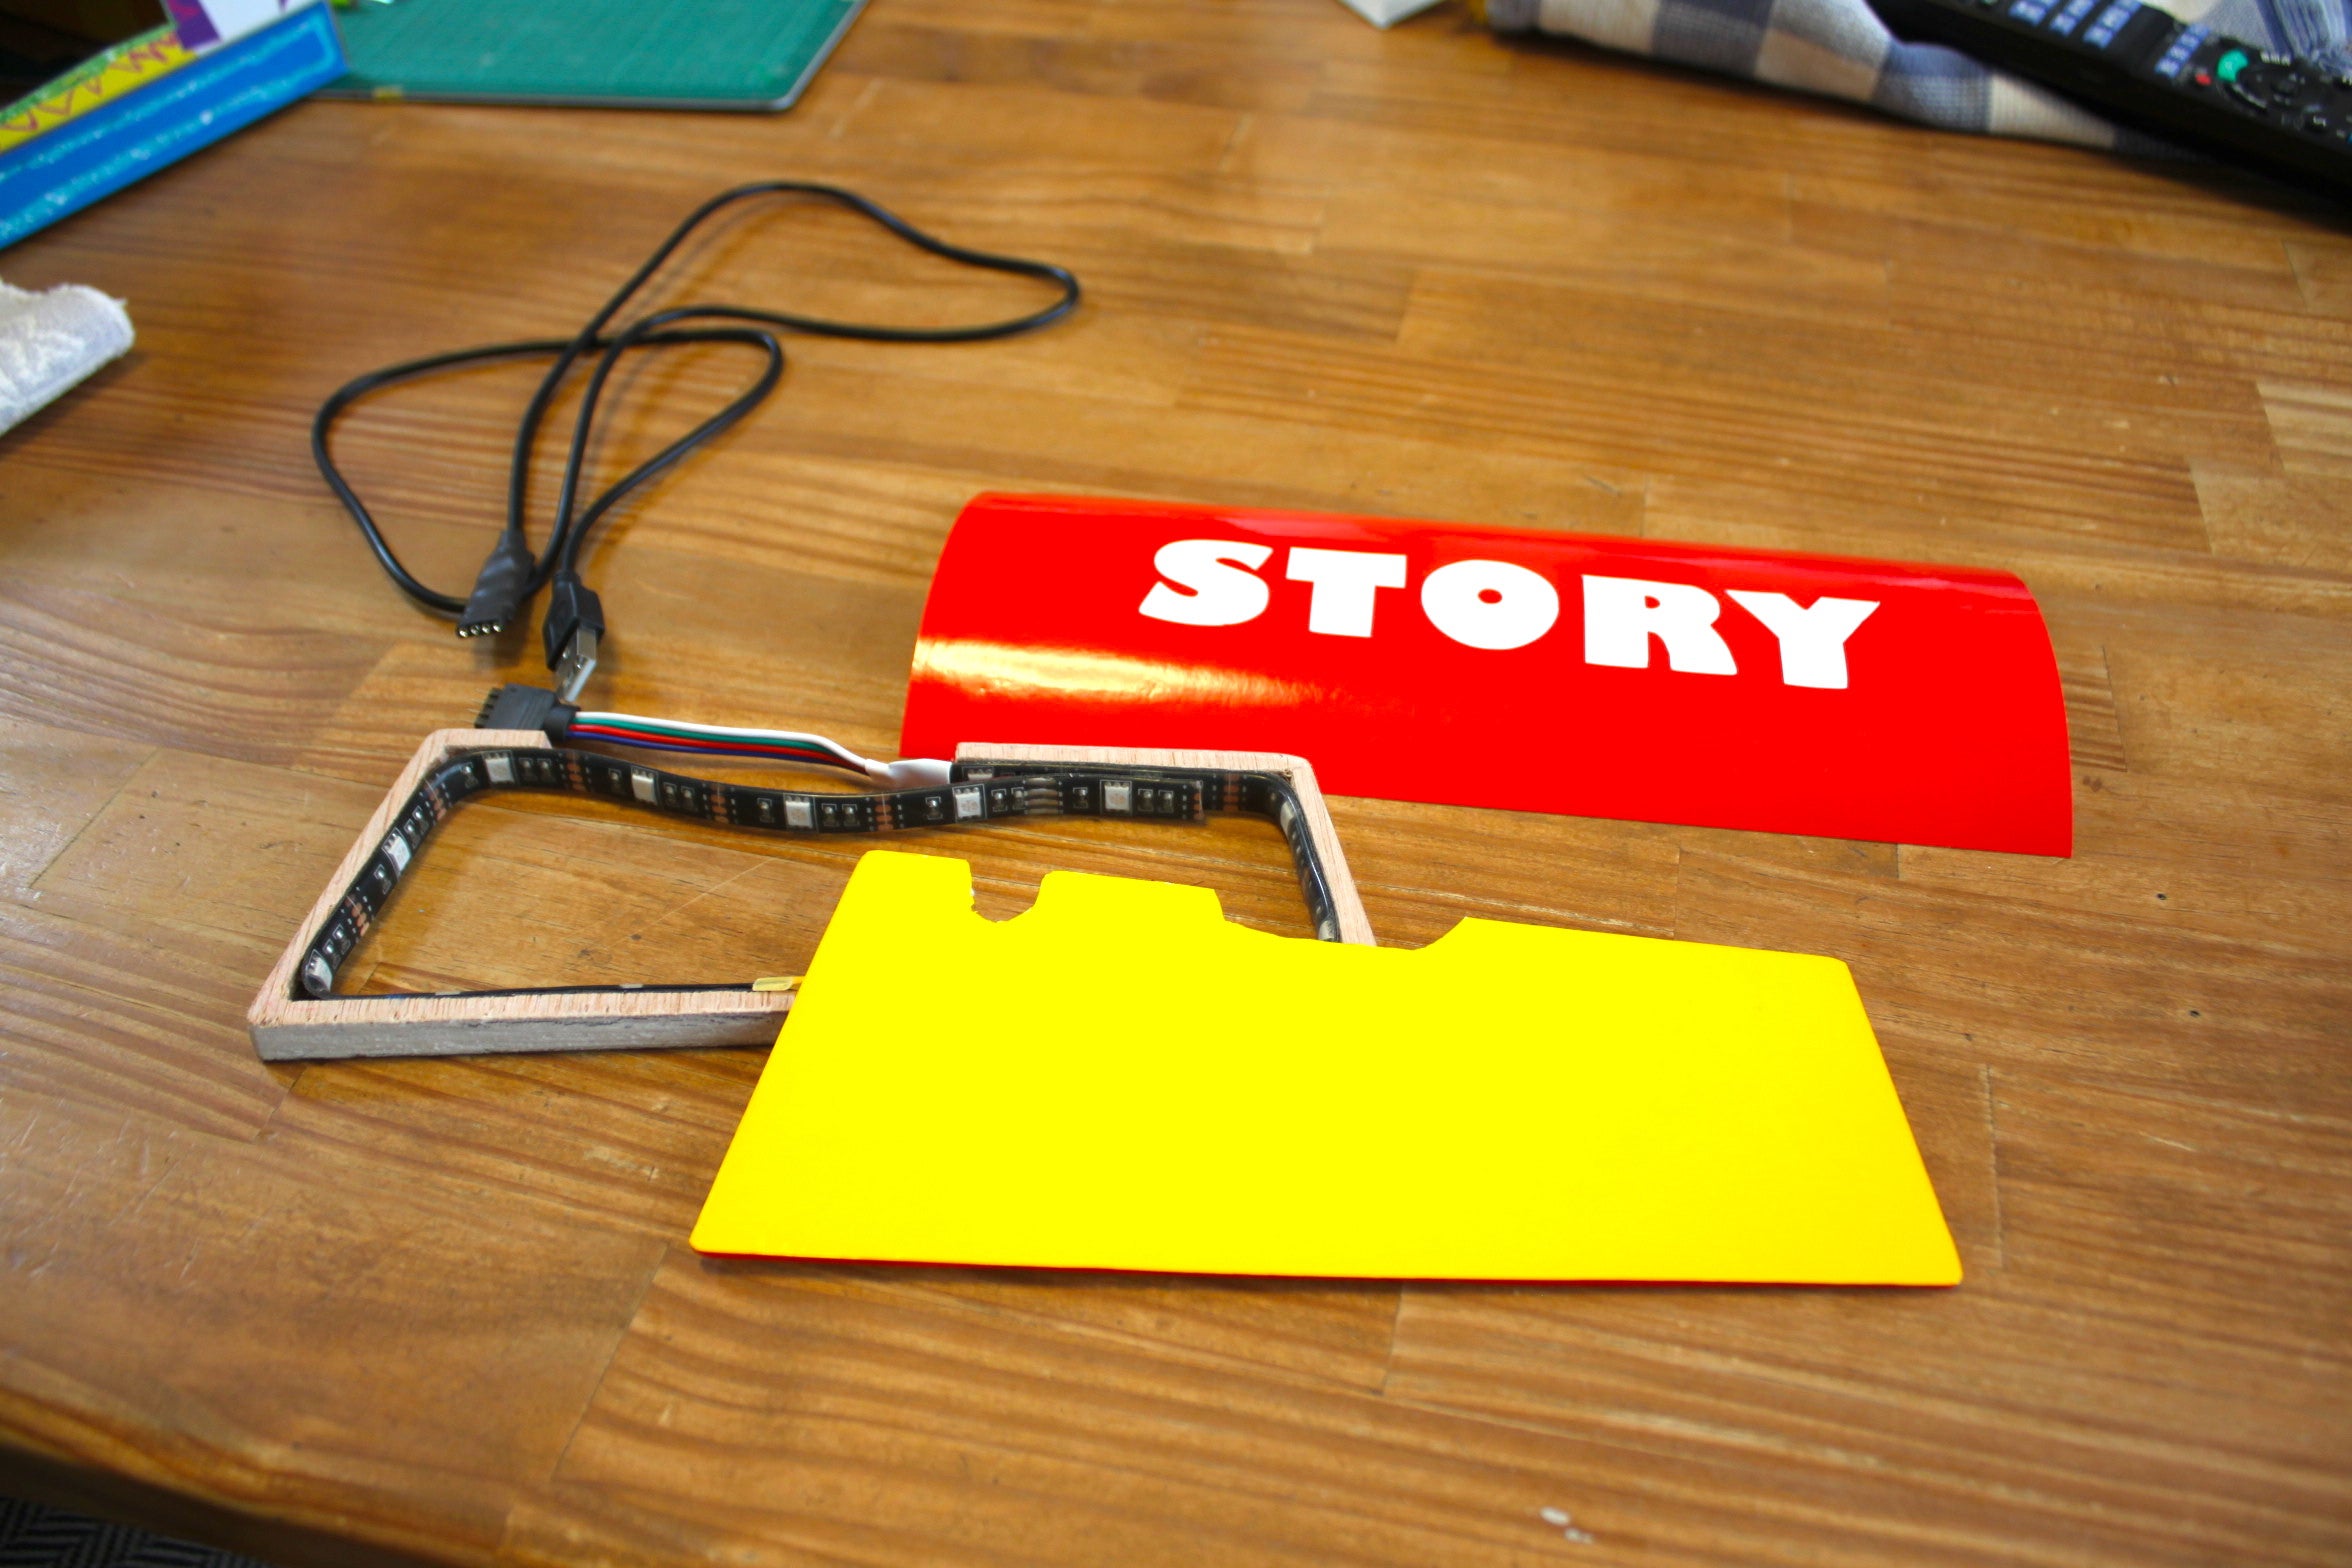
「STORY」の文字板は、輪郭をベニアで作って赤に塗装!
The letter board of "STORY" made an outline with veneer. I paint it in red!
プラ板は、カッティングシールを使います。
(塗らない訳:裏から光を入れると微妙な塗りムラが全てバレます。)
The plastic board part uses the cutting seal.
(reason not to paint with. All the delicate coating spots come out when I let light from the back.)

そして、黄色貼って、次に赤!
Put yellow, and is red next!

赤を先に貼ったほうが、楽なんだけど、黄色が綺麗に発色しないんです!
The one where I put red on earlier is comfortable. But yellow does not develop neatly.


塗装が終わったら、電球を入れてグルーガンで裏から固定していきました。
When the painting was over, I put an electric bulb and fixed it for a Hot Melt Glue Gun from the back.
電球をマジックで黄色く塗って....
I painted an electric bulb yellow by a magic

完成!!!! Completion! !!

どう?本物っぽい?
How about? Is it a genuine article-like?
部屋の電気消しましょう!
Let's turn off the lights in the room!

動画もどうぞ! Please see a video.
わかったかな?妥協の「O」
Did you understand? "O" of the compromise
11個の電球。11は奇数。Oは、1周して戻ってくる...
11 electric bulbs. 11 is an odd number. O does one lap and comes back
どうしても同じパターンの光が2個並ぶとこができてしまう....
Two light of the same pattern forms a line by all means.
感想として...
Impression...
作る工程は、たいしたことなかったけど、文字の高さ、電球の長さ、
色のパターン.....
The process to make did not matter much. But it is the high letter.
The length of electric bulb. The pattern of color......
いろいろ考えさせられました!
I was made to think!
でかいの作った方が、楽だったかな?
上映までに出来上がってよかった!
It was good to be completed before the screening!
そうそう! TOY STORY4のロゴ。
Oh, yes! A logo of TOY STORY4.
普通のやつは、4は、やや斜め。
As for the normal logo, 4 is slightly diagonal.
このポスターは、4は平。 違うんですよ!
As for this poster, 4 is flat. Different!
なのに...Tが分厚いから
However, because T is thick.
自立しません......![]()
This does not become independent...
では、また。
See you.
懲りずに見に来てください!
Please come to see it without learning lesson!