[Re-R HYBRID Ver.ZERO]
https://ameblo.jp/mdrjy849/entry-12691091017.html
Reservations can be made by email.
d-like@mirror.ocn.ne.jp
※Release is scheduled for October.
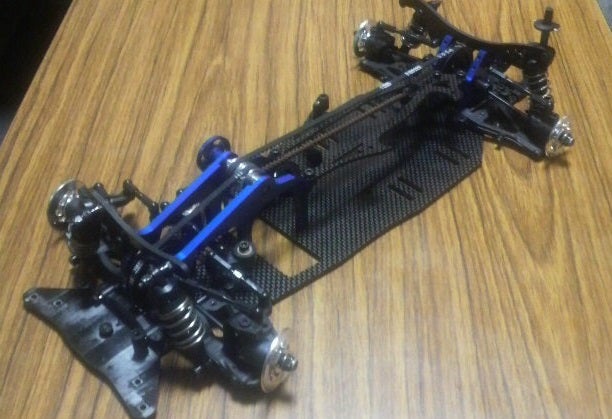

【Re-R HYBRID Ver.ZERO】


Basically, it's the same as the previous Re-R HYBRID.
However, until now it was an AWD-based Kit
This Ver.ZERO is based on RWD
Optimized based on data obtained over the 7 years since its release.

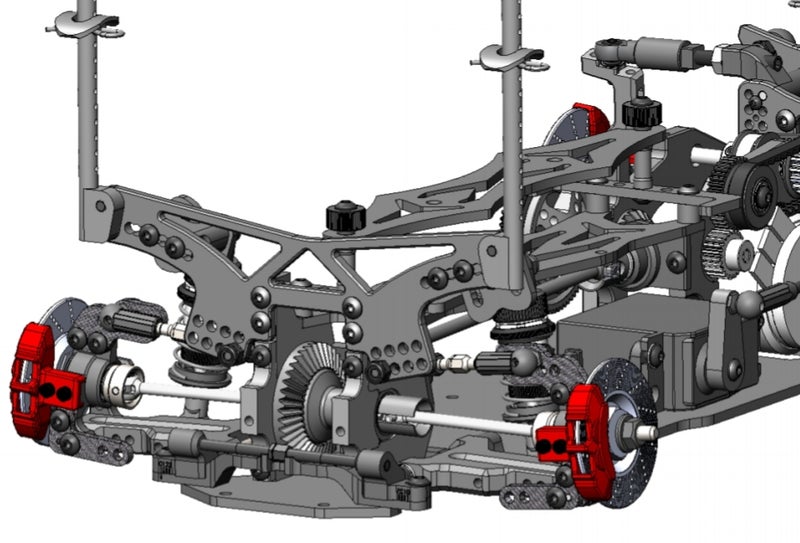
There is no "dog bone" on the front
In AWD, the bearing size was set in consideration of durability because the load is applied.
It has been changed to a size with less rotational resistance.
For those who want to run with AWD, with the conventional bearing and front universal shaft set
If you buy the right size bearings, you can run on AWD.
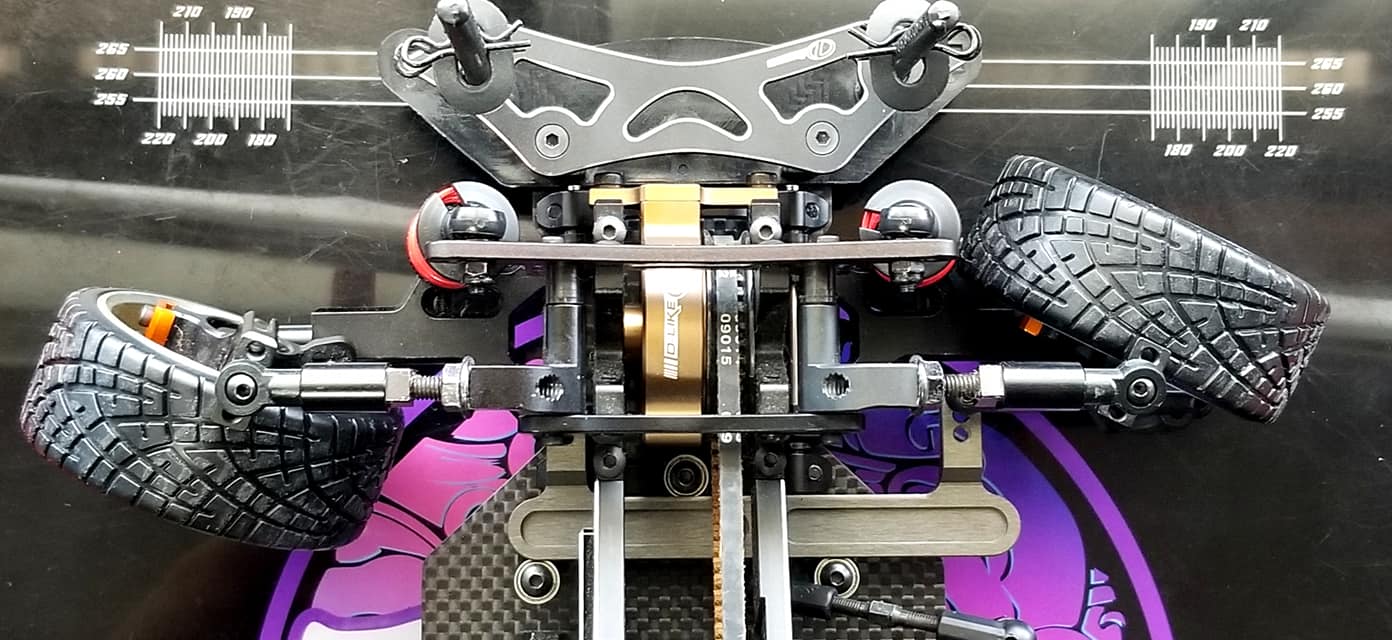
By the way, the elaborately made Re-R hybrid front knuckle
Geometry settings.
This shape is the result of careful consideration of the balance of the front and rear roll centers.

The design of the front lower arm has been changed by optimizing the positional relationship settings based on the data accumulated for 7 years by those who are running in RWD.
Extend the lower arm by 3mm considering the balance of the front and rear treads
The shape has been revised so that it does not interfere even if the cutting angle increases.
Change to appropriate screws to ensure strength accordingly
※Steering plate※

Widen the range of motion
We are increasing the number of mounting holes.
Over the years, we have optimized the RWD specifications based on data from many users.
I've been doing a lot of trial and error
Because this part is susceptible to impact in a crash
(Although some strength is required),
The part that affects the running if it is slightly distorted.
If you feel something is wrong, it's a part that you want to replace immediately.
I want to keep the price of parts as low as possible.
Ver. Zero is RWD, so there is no front dog pawn.
Increased degree of freedom and space such as steering angle
I increased the adjustment hole in one place so that I can try various things.

Alignment was set based on the data of the vehicle height and suspension of everyone who uses Re-R Hybrid in RWD.
It's a casual part,
It ’s not like the left and right tires are completely cut,
Seeking controllability from the middle to a deep angle from the beginning of cutting
Considering the running cost, it became this shape.


To avoid interference with the belt due to the wider range of movement of the steering plate
Changed the front pulley from 40T to 37T
I used a belt tensioner to lift the belt up a little and let it escape.

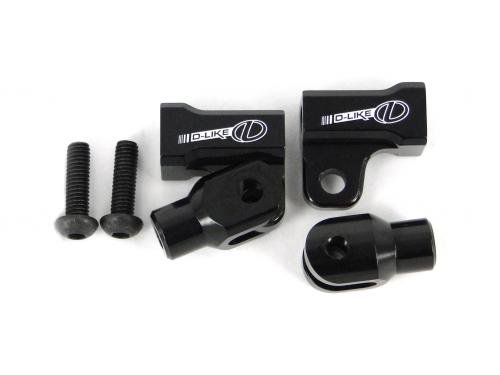
※Damper stay with full length adjustment mechanism※
Rear damper full length adjustment mechanism that was planned to be set as an option.
I decided to make it standard equipment. ..

By making the base for mounting the rear damper adjustable
The damper length can be adjusted at the mounting position.

A silicon attachment is used for the rear lower arm to ensure smooth movement.
Even if it is worn out and loose, it can be corrected by simply replacing the silicon attachment.

How to install the damper from the front side and the rear side
It has been changed to a shape that can be attached to either.

The strength and maintainability have been further improved.
I thought about various adjustment mechanisms, but
As a result of emphasizing durability as a kit, we have improved these two points this time.
I think the most important thing is not to break.
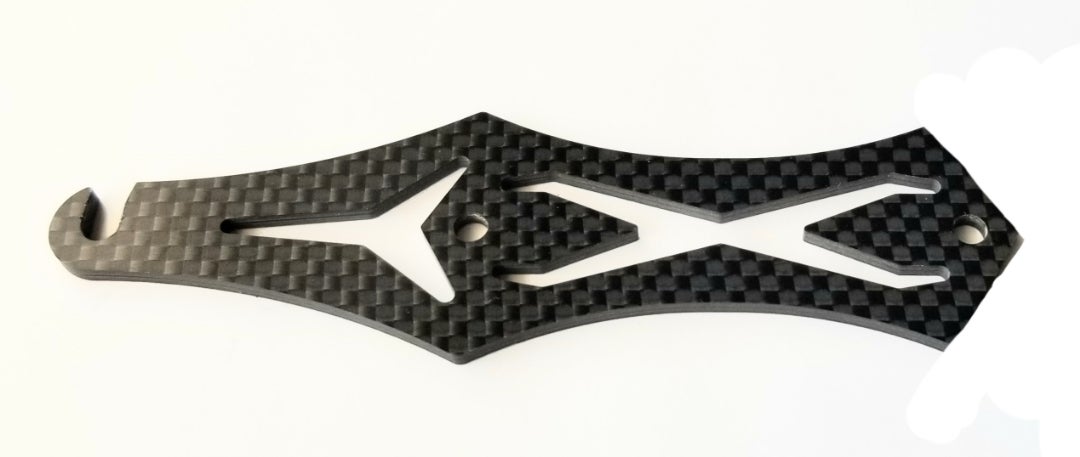
※Rear damper mount※
Depending on the body, it has been changed to a shape that eliminates the protrusion that has been an obstacle until now

Simplified by leaving only the mounting holes required for adjustment.

Until now, solid differentials have been standard specifications.
For those who want to use ball diffs and gear diffs
I used to use parts for Yokomo's Dripake
In this Ver.ZERO, it will be a ball diff as standard.

I think there are various tastes and driving environments,
According to the statistics of those who use Re-R HYBRID
For the result that many people use ball diff
I changed it accordingly.
Newly designed differentials are also under development,
It makes this type having the use familiar data.
So, when repairing, you can use Yokomo's parts as well.
rest assured.


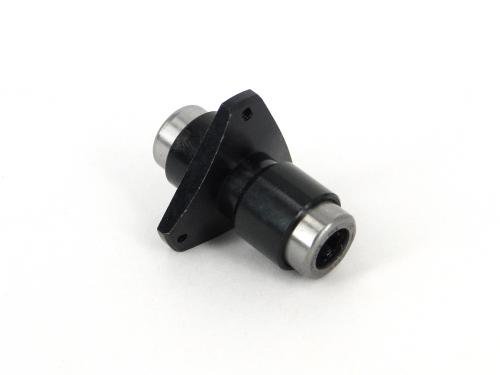
Until now, it was equipped with a front one-way because it was a 4WD setting.
But
ver. Zero is the RWD setting.

For that reason,
It is newly manufactured by machined aluminum for RWD.
If you want to drive with AWD
One-way axle
Please use this.
* Front damper mount *
Optimized shape and damper mounting hole position

The mounting holes on the upper arm
The inside is for 2mm suspin to which a standard upper arm can be attached
The outer hole is a 3mm screw hole


It is possible to change to the upper arm using the triangle arm block.

Front bulkhead shape change

(Old front bulkhead R)
And here is the zero front bulkhead R

It is designed to secure space around the steering plate in consideration of the degree of freedom around the steering and future development.

The adjustment range is widened by increasing the number of holes in the steering post.

This has made it possible to install motors with large end bells.
* Front bulkhead L *

(Old front bulkhead L)
It has basically the same shape, but a fan can be attached to the top of the motor.

(Ver,Zero front bulkhead L)

Although it is a small change, it has evolved considering the weight balance and heat dissipation effect.
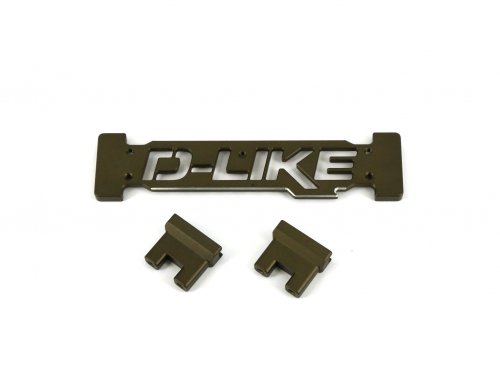
* Cereal plate *

A plate dedicated to "Zero" will be installed
※Main chassis※

・Added steering horn post mounting holes to accommodate motors with large end bells
・The chassis width has been increased to improve the amplifier installation area.
・Since the servo mounting direction can be selected, the weight distribution can be adjusted.

※Newly designed battery holder※


When using a short battery

Use this mounting hole.


Personally, I think it's okay to have it in terms of design,

but if you cut it at this part and use it, it will be refreshing.
There is also an optional "one-touch battery holder".