
A suspended ceiling made of plasterboard remains one of the most popular solutions for leveling the surface, hiding communications and creating interesting design solutions in residential and commercial spaces. This technology allows you to quickly get a perfectly even plane, install built-in lighting, sound insulation or even multi-level structures. Correct installation ensures durability and aesthetic appearance for many years. This article examines the entire process in detail - from the preparation of materials to finishing.
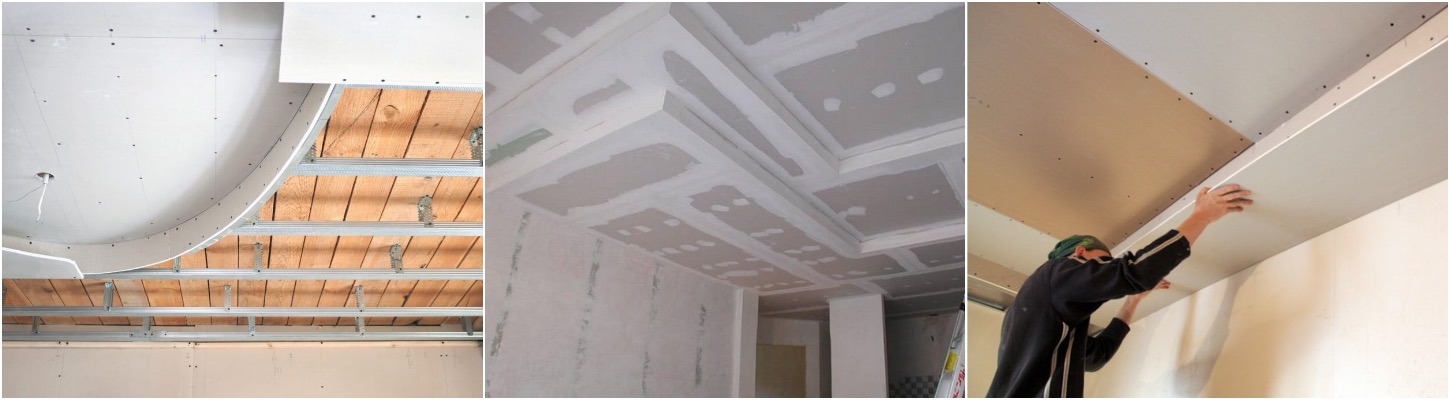
Advantages of a suspended ceiling made of plasterboard
Plasterboard suspended systems have a number of significant advantages compared to other types of decoration. First, they allow you to hide the unevenness of the base ceiling without the need for time-consuming plaster leveling. Secondly, it is convenient to lay electrical wiring, ventilation ducts and other communications inside the frame. Thirdly, plasterboard lends itself well to processing - it can be painted, pasted over with wallpaper or combined with other materials.
An additional advantage is the possibility of creating multi-level structures, niches, wavy lines and other architectural elements. With proper installation, such a ceiling increases the sound insulation of the room and allows you to install effective thermal insulation. It is only important to follow the technology and use quality materials to avoid sagging or cracks in the future.
Necessary materials and tools
Before starting work, you need to prepare a complete set of materials and tools. The reliability of the entire structure depends on the quality of the components. The main material is plasterboard sheets. For living rooms, ordinary plasterboard with a thickness of 9.5 or 12.5 mm is usually chosen. In wet rooms (kitchen, bathroom) it is necessary to use moisture-resistant plasterboard of green color.
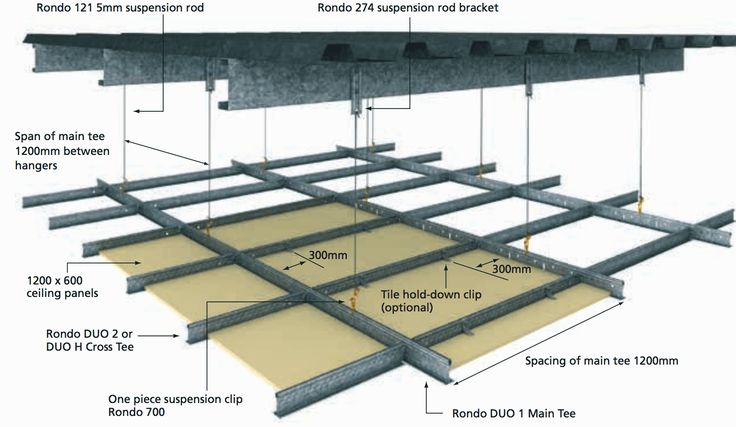
For the frame, you will need metal profiles: guide (UD or PN) and rack (CD or PP). You also need straight or anchor hangers, dowels, self-tapping screws for metal and plasterboard, sickle tape, putty for seams and primer. For sound or heat insulation, you can add mineral wool of the appropriate thickness.
From the tools, you need a perforator or drill, a screwdriver, metal scissors, a level (preferably a laser), a tape measure, a pencil, a knife for plasterboard, spatulas, a sanding grater and safety glasses with gloves.
| Material | Appointment | Recommended characteristic |
| Drywall | Main cladding | Thickness 12.5 mm, regular or moisture resistant |
| UD profile | Directional along the perimeter | The size is 28×27 mm |
| CD profile | Supporting frame | The size is 60×27 mm |
| Direct suspension | Fastening profiles to the ceiling | Length 120-300 mm |
Room preparation and marking
The first stage is thorough preparation. Furniture is removed from the room or covered with film. Old lamps are removed from the ceiling, the old coating is dismantled if it is peeling off. The surface is cleaned of dust and treated with an antiseptic, especially if there are signs of mold.
Next, markup is performed. First, the lowest point of the base ceiling is determined using a laser level or spirit level. From this point, the required height of the future suspended structure is set aside. Usually leave a minimum of 5-10 cm for communications, and if you plan built-in lights - more. Along the perimeter of the walls, a horizontal line is reflected at the chosen height.
Places for attaching suspensions are marked on the ceiling. The lines of the supporting profiles are placed parallel with a step of 40 or 60 cm depending on the thickness of the plasterboard and the load. Hangers are installed every 50-60 cm along these lines. It is important to check all dimensions several times to avoid distortions.
Installation of the guide profile
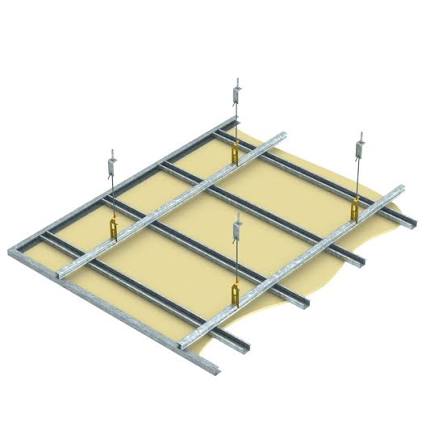
The UD guide profile is fixed along the marked line on the walls. For this purpose, dowels are used with a step of 40-50 cm. In the corners, the profiles are joined with an overlay or cut at 45 degrees. If the walls are uneven, you can put small pads between the profile and the wall, but it is better to level the wall in advance. Reliability of fixing the guide profile determines the stability of the entire frame.
Assembling the frame from profiles
After installing the guides, proceed to the installation of suspensions. They are attached to the base ceiling with dowels or anchors strictly according to the markings. The ends of the hangers are bent down. Then insert the CD bearing profiles into the guides and fasten them in the hangers with self-tapping screws. The horizontality of each profile is constantly controlled by a level.
If the length of the room exceeds the length of one profile, they are connected with special extensions or an overlay with an overlap of at least 30 cm and fixing with self-tapping screws. To increase the rigidity of the frame, sometimes transverse jumpers from the same CD profile are added with a step of 40-60 cm. There must be a profile in the joints of the plasterboard sheets so that the seam does not sag.
At this stage, the wiring for future lighting is also laid. Wires are placed in corrugated pipes and fixed to profiles or hangers so that they do not come into direct contact with plasterboard. If sound insulation is planned, mineral wool is placed between the profiles after assembling the frame, but before sheathing with sheets.

Inspection of the frame before cladding
Before fixing the plasterboard, the frame is once again checked for stiffness and evenness. All connections must be tight, profiles must not wobble. Use a laser level or a long rule to control the plane of the entire structure. Any deviations are corrected immediately by bending the hangers or rearranging the fasteners. This stage is critically important, because it will be much more difficult to correct errors after plating.
Fastening plasterboard sheets
Plasterboard sheets are raised to the frame and begin to be fastened from the corner of the room. It is better to work together - one supports the sheet, the other tightens the self-tapping screws. Self-tapping screws for plasterboard are screwed in at intervals of 15-20 cm along the edges and 20-25 cm in the middle of the sheet. The head of the self-tapping screw should be slightly recessed, but not pierce the cardboard layer.
Adjacent sheets are laid with offset seams (at a stagger), like brickwork. A small gap of 1-2 mm is left between the sheets for subsequent putty. A small compensatory gap is also left at the edges where the sheet adjoins the wall. If you need to cut the sheet, use a sharp knife - first cut through the cardboard on one side, then break the gypsum core and cut through the second layer of cardboard.
In the places of future lamps or chandeliers, holes are pre-cut with a crown of the appropriate diameter. For heavy chandeliers, the frame is additionally strengthened with built-in elements made of plywood or metal. After the entire plane is completely closed, check once again whether all self-tapping screws are recessed and whether there are no protruding edges.
- Prepare and mark sheets before lifting
- Fasten the sheets perpendicular to the supporting profiles
- Adhere to the displacement of the end seams of at least 40 cm
- Do not allow the overlap of the seams with the axes of the suspensions
- Control the screwing depth of each self-tapping screw
Processing of seams and preparation for finishing coating
After the installation of the sheets, the stage of sealing the seams comes. First, all joints and heads of self-tapping screws are treated with a primer. Then the reinforcing crescent tape or paper tape is pasted on the seams. A special putty for seams is applied on top of the tape in several layers with intermediate drying and sanding.
The corners of the room are strengthened with perforated corners, which are also puttyed. After complete drying of the entire surface of the ceiling, it is sanded with a fine-grained abrasive, removing irregularities. Then a finishing putty is applied in a thin layer over the entire plane to hide the joints and prepare the base for painting or other coating.
The final stage is the priming of the entire surface. The primer improves the adhesion of the paint and reduces its consumption. After the soil dries, you can start painting. Water-based or acrylic paints are most often used for ceilings. They are applied with a roller in two or three layers with intermediate drying. It is desirable to apply the first layer from the window, the following ones - perpendicular to the previous one.
Peculiarities of work in wet rooms
Moisture-resistant plasterboard and special profiles with anti-corrosion coating must be used in bathrooms and kitchens. Seams are additionally treated with moisture-resistant compounds. If a stretch ceiling is planned in combination with plasterboard boxes, first mount the plasterboard part, and only then install the tension system. All electrical appliances in wet areas must have an appropriate degree of protection.
Common mistakes and how to avoid them
One of the most common mistakes is insufficient number of hangers or too large step of profiles. This causes the ceiling to sag over time. Another common problem is the lack of displacement of the seams between the sheets, due to which cracks appear at the joints. Also, many people forget to leave compensatory gaps near the walls, and the coating can deform with temperature changes.
Poor-quality fastening of self-tapping screws is another cause of problems. If the self-tapping screw breaks through the cardboard, it loses its holding power. If, on the contrary, it is not recessed enough, it will be visible even after putty. Therefore, it is important to control the depth of twisting. The use of ordinary plasterboard in wet rooms is almost guaranteed to lead to swelling and destruction of the material.
To avoid these mistakes, you should carefully follow the technology, do not skimp on components and, if necessary, consult experienced craftsmen. If you're a first-timer, it's best to start in a small space, such as a pantry or hallway, to build up your skills.
Care of a suspended ceiling made of plasterboard
Finished plasterboard ceiling does not require complex maintenance. Wipe it regularly with a damp (not wet) cloth or a soft dust brush. Avoid strong impacts and mechanical damage. If small cracks appear, they can be puttyed and repainted. In case of serious damage, a separate sheet can be replaced without dismantling the entire structure.
In rooms with high humidity, monitor the operation of ventilation so that condensate does not accumulate on the surface. If you plan to install heavy decorative elements or additional lamps in the future, provide for embedded parts at the frame assembly stage.
Conclusion
Installation of a suspended ceiling made of plasterboard is a process that requires attention, precision and compliance with technology, but it is quite accessible for independent implementation if you have basic skills and tools. A properly assembled frame, high-quality fastening of sheets and careful processing of seams guarantee a flat, strong and durable surface. By following the described stages, you will be able to create a modern and functional ceiling that will become the basis for any interior design. The main thing is to take your time, check every step and use reliable materials.