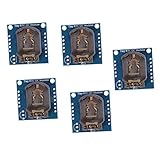
データロガーには、データそのものとともに、データを取得した時刻を記録する機能が必要です。Arduinoには時計が内蔵されていますが、電源が切れるたびにリセットされます(1970年1月1日などにタイムスリップします)。これでは不便なので、時計(RTC: Real Time Clock)モジュールを取り付けます。このRTCモジュールにはコイン電池をつなぎ、常に給電させておきます。RTCモジュール自体は非常に省電力なので、コイン電池で数年持ちます。
#include <ds3232rtc.h>    //http://github.com/JChristensen/DS3232RTC
#include <time.h>         //http://www.arduino.cc/playground/Code/Time
#include <timelib.h>
#include <wire.h>         //http://arduino.cc/en/Reference/Wire (included with Arduino IDE)

void setup(void)
{
    Serial.begin(9600);
    while (!Serial) {
    ; // wait for serial port to connect. Needed for native USB port only
    }

    /* ----- Initialisation of time ----- */
    setTime(23, 8, 00, 9, 2, 2020);   // set the system time in Arduino [Hour, Min, Sec, Day, Month, Year]
    RTC.set(now());   // set the RTC time according to Arduino (Need to activate only when the RTC module has to be re-set)

    if(timeStatus() != timeSet)
       Serial.println("Unable to sync with the RTC");
    else
       Serial.println("RTC has set the system time");

    delay(1000);
}

void loop(void)
{

}
#include <SPI.h>
#include <SD.h>
#include <DS3232RTC.h> //http://github.com/JChristensen/DS3232RTC#include <Time.h>
#include <TimeLib.h>
#include <Wire.h>
const int chipSelect = 10; // Arduino UNOでは10、Arduino MEGAでは53
void setup(void)
{
/* ----- Setting up serial communication with PC ------ */
/* ここでUSBを介してPCとシリアル通信を始める。9600はシリアル通信のボーレート */
Serial.begin(9600);
while (!Serial) {
; // wait for serial port to connect. Needed for native USB port only
//何らかの問題があってシリアルポートに接続できないときは、このループにトラップされる
}
/* ----- Initialisation of SD card ------ */
Serial.print("Initializing SD card...");
//see if the card is present and can be initialized:
if (!SD.begin(chipSelect)) {
Serial.println("Card failed, or not present");
// don't do anything more:
return;
}
Serial.println("card initialized.");
/* ----- Setting time based on RTC ----- */
setSyncProvider(RTC.get); // ここでRTCの時刻をもとにArduinoの時刻を合わせる
if(timeStatus() != timeSet)
Serial.println("Unable to sync with the RTC");
else
Serial.println("RTC has set the system time");
delay(1000);
}
void loop(void)
{
int ainput; //読み取ったbit数:intは整数
float vinput; //bit数を電圧に変換したもの:floatは浮動小数点数
/* データの読み取り */
ainput=analogRead(A0); //ピンA0から電圧をbitとして読む
vinput=5000.0*ainput/1024; //上記を電圧mVに変換
//ここで5000.0でなく5000とすると、整数としてvinputにキャストされてしまう)
//粗い値になったり、おかしな値になったりする
/* PCのシリアルモニタに表示 */
Serial.print(year());Serial.print("/");Serial.print(month());Serial.print("/");Serial.print(day());Serial.print(" ");
Serial.print(hour());Serial.print(":");Serial.print(minute());Serial.print(":");Serial.print(second());Serial.println("");
Serial.print(ainput);
Serial.println(" bit"); //" bit"と表示、printではなくprintlnとすることで改行する
Serial.print(vinput);
Serial.println(" mV"); //" mV"と表示、printではなくprintlnとすることで改行する
/* SDカードに書き込み */
File dataFile = SD.open("datalog.csv", FILE_WRITE);
if (dataFile)
{
dataFile.print(year());dataFile.print("/");dataFile.print(month());dataFile.print("/");dataFile.print(day());dataFile.print(" ");
dataFile.print(hour());dataFile.print(":");dataFile.print(minute());dataFile.print(":");dataFile.print(second());dataFile.print(" ");
dataFile.print(ainput);
dataFile.print(" bit, "); //" bit"と表示
dataFile.print(vinput);
dataFile.println(" mV"); //" mV"と表示、printではなくprintlnとすることで改行する
}
dataFile.close();
delay(2000); //2000ミリ秒=2秒の停止
}