あと、指定したビューに戻ったときに、そのビューのメソッドも実行する方法も。
FirstView、SecondView、ThirdView、FourthViewの4つビューを作って、FourthViewに以下の処理を行わせるボタンを作成する。
・SecondViewへ戻る
・SecondViewへ戻る+SecondViewのメソッドを実行
・rootビューへ戻る
以下コード。
主要部分だけを説明していく。赤字の部分がポイント箇所。
◎AppDelegate.h
#import <UIKit/UIKit.h>
#import "FirstViewController.h"

@interface AppDelegate : UIResponder

@property (strong, nonatomic) UIWindow *window;
@property (strong, nonatomic) FirstViewController *firstViewController;

@end
◎AppDelegate.m
#import "AppDelegate.h"

@implementation AppDelegate

@synthesize window = _window;
@synthesize firstViewController = _firstViewController;

- (BOOL)application:(UIApplication *)application didFinishLaunchingWithOptions:(NSDictionary *)launchOptions
{
    self.window = [[UIWindow alloc] initWithFrame:[[UIScreen mainScreen] bounds]];
    // Override point for customization after application launch.
    self.firstViewController = [[FirstViewController alloc] initWithNibName:@"FirstViewController" bundle:nil];

    // ナビゲーションコントローラを追加
    UINavigationController *navigationController = [[UINavigationController alloc] initWithRootViewController:self.firstViewController];
    self.window.rootViewController = navigationController;

    self.window.backgroundColor = [UIColor whiteColor];
    [self.window makeKeyAndVisible];
    return YES;
}

@end
------------------------------------------------------
◎FirstViewController.h
#import <UIKit/UIKit.h>
#import "SecondViewController.h"

@interface FirstViewController : UIViewController {

}

- (void)navigationRightBtnAction;

@end
◎FirstViewController.m
#import "FirstViewController.h"

@implementation FirstViewController

- (void)viewDidLoad
{
    [super viewDidLoad];
    // Do any additional setup after loading the view from its nib.

    // ナビゲーションバーのタイトルを設定
    self.navigationItem.title = @"FirstView";

    // ナビゲーションバー Rightボタン
    UIBarButtonItem *rightBarItem = [[UIBarButtonItem alloc] initWithTitle:@"次へ"
                                                                     style:UIBarButtonItemStyleBordered
                                                                    target:self
                                                                    action:@selector(navigationRightBtnAction)];
    self.navigationItem.rightBarButtonItem = rightBarItem;
}


/* ============================================================================== */
#pragma mark - Button Action
/* ============================================================================== */
// ナビゲーションバーのRightボタンアクション
- (void)navigationRightBtnAction
{
    // SecondViewControllerへ遷移
    SecondViewController *secondViewController;
    secondViewController = [[SecondViewController alloc]
                            initWithNibName:@"SecondViewController"
                            bundle:nil];
    [self.navigationController pushViewController:secondViewController animated:YES];
}


@end
------------------------------------------------------
◎SecondViewController.h
#import <UIKit/UIKit.h>
#import "ThirdViewController.h"

@interface SecondViewController : UIViewController {

}

- (void)labelView;
- (void)navigationRightBtnAction;

@end
◎SecondViewController.m
#import "SecondViewController.h"

@implementation SecondViewController

- (void)viewDidLoad
{
    [super viewDidLoad];
    // Do any additional setup after loading the view from its nib.

    // ナビゲーションバーのタイトルを設定
    self.navigationItem.title = @"SecondView";

    // ナビゲーションバー Rightボタン
    UIBarButtonItem *rightBarItem = [[UIBarButtonItem alloc] initWithTitle:@"次へ"
                                                                     style:UIBarButtonItemStyleBordered
                                                                    target:self
                                                                    action:@selector(navigationRightBtnAction)];
    self.navigationItem.rightBarButtonItem = rightBarItem;
}


// FourthViewからの遷移時に実行
- (void)labelView
{
    // ラベルを表示
    UILabel *label = [[UILabel alloc] init];
    label.frame = CGRectMake(60, 100, 100, 30);
    label.backgroundColor = [UIColor yellowColor];
    label.text = @"text";
    [self.view addSubview:label];
}


/* ============================================================================== */
#pragma mark - Button Action
/* ============================================================================== */
// ナビゲーションバーのRightボタンアクション
- (void)navigationRightBtnAction
{
    // ThirdViewControllerへ遷移
    ThirdViewController *thirdViewController;
    thirdViewController = [[ThirdViewController alloc]
                           initWithNibName:@"ThirdViewController"
                           bundle:nil];
    [self.navigationController pushViewController:thirdViewController animated:YES];
}


@end
------------------------------------------------------
◎ThirdViewController.h
#import <UIKit/UIKit.h>
#import "FourthViewController.h"

@interface ThirdViewController : UIViewController {

}

- (void)navigationRightBtnAction;

@end
◎ThirdViewController.m
#import "ThirdViewController.h"

@implementation ThirdViewController

- (void)viewDidLoad
{
    [super viewDidLoad];
    // Do any additional setup after loading the view from its nib.

    // ナビゲーションバーのタイトルを設定
    self.navigationItem.title = @"ThirdView";

    // ナビゲーションバー Rightボタン
    UIBarButtonItem *rightBarItem = [[UIBarButtonItem alloc] initWithTitle:@"次へ"
                                                                     style:UIBarButtonItemStyleBordered
                                                                    target:self
                                                                    action:@selector(navigationRightBtnAction)];
    self.navigationItem.rightBarButtonItem = rightBarItem;
}

/* ============================================================================== */
#pragma mark - Button Action
/* ============================================================================== */
// ナビゲーションバーのRightボタンアクション
- (void)navigationRightBtnAction
{
    // ThirdViewControllerへ遷移
    FourthViewController *fourthViewController;
    fourthViewController = [[FourthViewController alloc]
                           initWithNibName:@"FourthViewController"
                           bundle:nil];
    [self.navigationController pushViewController:fourthViewController animated:YES];
}


@end
------------------------------------------------------
◎FourthViewController.h
#import <UIKit/UIKit.h>
#import "SecondViewController.h"

@interface FourthViewController : UIViewController {

}

- (void)btnAction:(UIButton*)sender;

@end
◎FourthViewController.m
#import "FourthViewController.h"

@implementation FourthViewController

- (void)viewDidLoad
{
    [super viewDidLoad];
    // Do any additional setup after loading the view from its nib.

    // ナビゲーションバーのタイトルを設定
    self.navigationItem.title = @"FourthView";

    // ボタン1
    UIButton *btn1 = [UIButton buttonWithType:UIButtonTypeRoundedRect];
    btn1.frame = CGRectMake(30, 120, 260, 30);
    btn1.tag = 1;
    [btn1 setTitle:@"SecondViewへ遷移" forState:UIControlStateNormal];
    [btn1 addTarget:self action:@selector(btnAction:)forControlEvents:UIControlEventTouchDown];
    [self.view addSubview:btn1];

    // ボタン2
    UIButton *btn2 = [UIButton buttonWithType:UIButtonTypeRoundedRect];
    btn2.frame = CGRectMake(30, 180, 260, 30);
    btn2.tag = 2;
    [btn2 setTitle:@"SecondViewへ遷移してメソッド実行" forState:UIControlStateNormal];
    [btn2 addTarget:self action:@selector(btnAction:)forControlEvents:UIControlEventTouchDown];
    [self.view addSubview:btn2];

    // ボタン3
    UIButton *btn3 = [UIButton buttonWithType:UIButtonTypeRoundedRect];
    btn3.frame = CGRectMake(30, 240, 260, 30);
    btn3.tag = 3;
    [btn3 setTitle:@"rootViewへ遷移" forState:UIControlStateNormal];
    [btn3 addTarget:self action:@selector(btnAction:)forControlEvents:UIControlEventTouchDown];
    [self.view addSubview:btn3];
}

/* ============================================================================== */
#pragma mark - Button Action
/* ============================================================================== */
- (void)btnAction:(UIButton*)sender
{
    if (sender.tag == 1) {
        // SecondViewControllerへ戻る
        [self.navigationController popToViewController:[self.navigationController.viewControllers objectAtIndex:1] animated:YES];
    }
    else if (sender.tag == 2) {
        // SecondViewControllerへ戻ってメソッドを実行
        SecondViewController *secondViewController = [self.navigationController.viewControllers objectAtIndex:1];
        [secondViewController labelView];
        [self.navigationController popToViewController:secondViewController animated:YES];
    }
    else
    {
        // 一番初めのViewへ戻る
        [self.navigationController popToRootViewControllerAnimated:YES];
    }
}


@end
以上がコード。
あまり大したことは書いてない。
重要なのはFourthViewControllerに書いた赤字の箇所くらい。
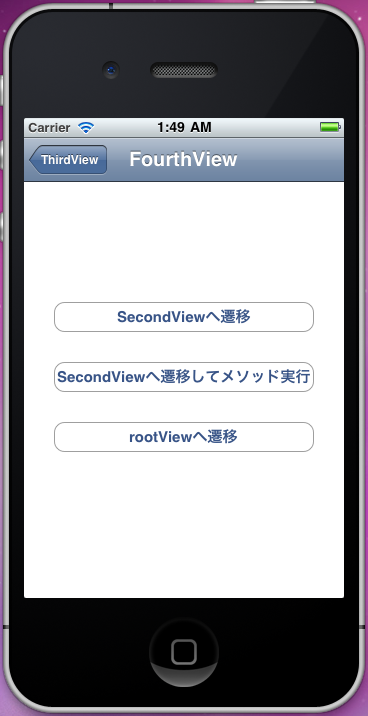
ビルドして実行した結果が下記画像。

↓ 「次へ」ボタンを押下

↓ 「次へ」ボタンを押下
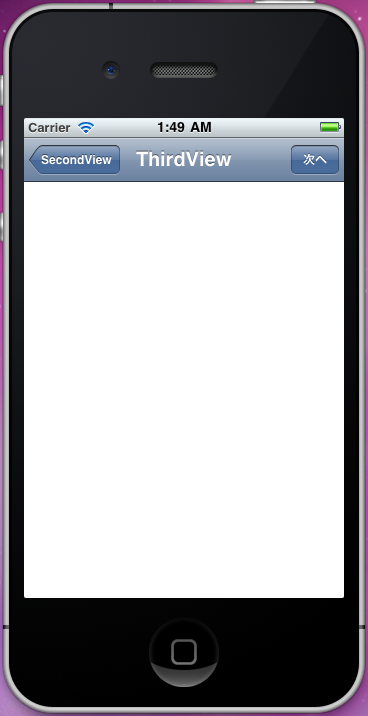
↓ 「次へ」ボタンを押下
↓ 「SecondViewへ遷移してメソッド実行」ボタンを押下

一気にSecondViewControllerへ戻り、且つSecondViewControllerのメソッドが実行されてラベルが表示されてる。
ちなみに、
「SecondViewへ遷移」ボタンは、押下するとSecondViewControllerへ戻るだけ。ラベルを表示するメソッドは実行されない。
「rootViewへ遷移」ボタンは、押下するとFirstViewControllerへ戻る。
SecondViewにpropoertyとかで変数を用意しておけば(例えば変数strだとする)、popで戻る前に
secondViewController.str = @"aaa";
のように記述すれば値を渡すことも可能。
使用頻度は低そうだけど、そのうち使うこともあるかも。
----------
サンプルソース:https://github.com/tetsuco/SampleUINavigationControllerBack