20 Myths About repair sash windows: Busted
Exactly How to Fix Sash Windows
Just how to maintain old home windows with putty, epoxy, as well as patience

Task information.
SKILL.
1 out of 5.
Easy.
Needs persistence as well as a constant hand to get rid of and also replace the glass.
PRICE.
$ 70 per home window.
APPROXIMATED TIME.
2 days.
Devices & Materials.
level prybar.
Flat lever.
flathead screwdriver.
Slotted screwdriver.
electrical warm weapon.
Warm Gun (with nozzle shield).
utility knife.
Utility blade.
putty knife.
Putty blade.
dremel.
Dremel with sculpting little bit.
All-natural Bristle Brush.
All-natural bristle paint brush.
artificial brush.
Artificial filament brush.
Single-pane double-hung windows from the 19th century do not have the very best of credibilities. They can be notoriously drafty, packed with rattles, loose in the joints, or can just reject to budge. But as a number of studies have actually revealed, when these home windows are effectively weatherstripped and also paired with good storm windows, they can match the performance of new double-pane units for much less than the brand-new ones price.
Paint professional John Dee, whose refinishing abilities are consistently seen in the pages of This Old Home, lately transformed the home windows in an 1882 home back into smooth operators-- as well as boosted their power efficiency, too. As he shows on the adhering to web pages, it was simply a matter of carefully removing each sash from its opening, stripping off the old paint as well as putty, as well as regluing the joints with epoxy. With new putty, paint, and weatherstripping, the sash are ready to deal with the cold and last through the 21st century as good as new.
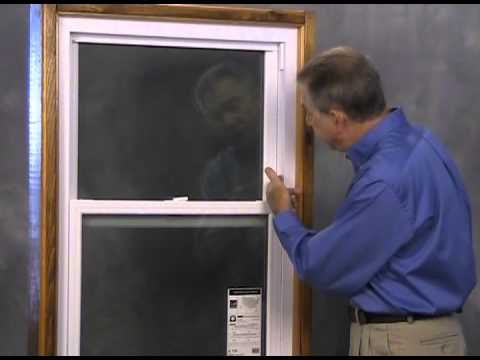
Paint professional John Dee reattaches the stops, the last step in his home window restoration. "Before this, opening up a window was a wrestling suit," he claims. "Now, they simply slide backwards and forwards.".
Action 1.
Obtain the Sash Out.
Pry off or loosen the quits (the moldings before the reduced sash).
Take out the lower sash, as well as take off the cables or chains on both sides.
Bind the cords to keep them from being pulled into the weight pockets.
Get rid of the parting beads (the upright strips holding the upper sash).
Pull out the upper sash, and also take off its cables or chains.

Eliminate the sash equipment as well as store in a labeled bag.
Step 2.
Free the Glass.
Soften old, hardened putty (polishing substance) with a warm weapon set to medium and also fitted with a nozzle guard. Scuff the putty away with a putty blade. This reveals the steel glazier's points; pry them out of the wood. Remove the glass, as well as label it so you recognize which open up to put it back into.
Step 3.
Clean Out the Joints.
Utilizing a rotary tool such https://teamrockie.com/when-is-the-right-time-to-repair-your-sash-windows/ as a Dremel, bone up any kind of soft or rotten wood wherever sash joints hang or open.
Step 4.
Apply the Epoxy.
To restore the cleaned-out joints, very first brush on the epoxy primer as well as allow it set for about 20 minutes. Then, using a plastic scrape, blend the two parts of the epoxy filler into a goop the uniformity of Vaseline. Pressure it into the joint, as well as spread out the mix over the sides to recover the joint's original form. Wait overnight, then trim the excess with an utility knife.
Suggestion: Secure pieces of Plexiglas over the damp epoxy. When it hardens, take the plastic off. You'll have a smooth surface area that does not need much sanding.
Tip 5.
Prime the Sash.
Wait an additional day, till the epoxy is totally treated, then hand-sand the sash with 100-grit paper, and clean up all the dust with a tack cloth. Seal the wood with a layer of oil-based guide.
Suggestion: "Without a layer of primer, the timber will certainly draw the oils out of the putty and turn it brittle prematurely."-- John Dee, paint service provider.
Step 6.
Bed the Glass.
Lay the sash outside side up. Roll polishing substance right into a lengthy rope, in between your hands and also press it right into the groove, or rabbet, around the pane opening. Gently push the pane uniformly into the substance till it's bedded concerning 1/16 inch from all-time low of the rabbet.
Step 7.
Insert the Points.
Making use of a putty blade, slide each new glazier's factor on the glass and push it direct first right into the wood sash. Plant at the very least 2 points, equally spaced, on each side of the pane. For big panes, the spacing between the factors need to not go beyond 12 inches.
Suggestion: "On warm days, oil the pointer of the putty knife with linseed oil so that it does not pull out the glazing compound."-- John Dee.
Tip 8.
Tool the Putty.
Press one more rope of substance around the edge of the pane. Make a smooth bevel in between the glass and sash by drawing a putty blade over the compound. Repeat on the various other panes. Wait a minimum of a week, then layer the putty with oil-based primer. Use a top coat of acrylic latex paint to the putty as well as sash.
Step 9.
Rehang the Sash.
If the windows have old weatherstripping, replace it; if there isn't any, include it. (See directions for weatherstripping a home window.) Tidy and reattach the equipment; oil the pulley axles with a silicone or Teflon spray. Reattach the cords or chains to the upper sash, and also reinstall the parting beads or replace them with new ones. Hook the cords or chains to the lower sash, then placed both quits back on the jamb to hold the brought back sash in place.
Tip: Strip paint-encrusted hardware by offering it an over night dip in a warm Crock-Pot filled with sudsy water.